Step 3: Add your team members in Ruana
Adding team members gives practitioners, admins, and front-desk staff secure access to Ruana. Each user has a role, belongs to a department, and receives an invitation email to create their own password. Practitioners also add a signature so charts and files can be signed properly.
▶️ Watch first: Adding team members, roles, and departments
(3 minute walkthrough: add a team member, create a department, save, and explain invitations)
On this page
- Where to find Team settings
- How to add a team member
- Most important fields
- Roles explained
- Creating and assigning departments
- What happens after saving
- Add a practitioner signature
- Important: Configure practitioner schedule & booking interval
- Managing access (admin controls)
- Best practices and common mistakes
- What’s next
- FAQ
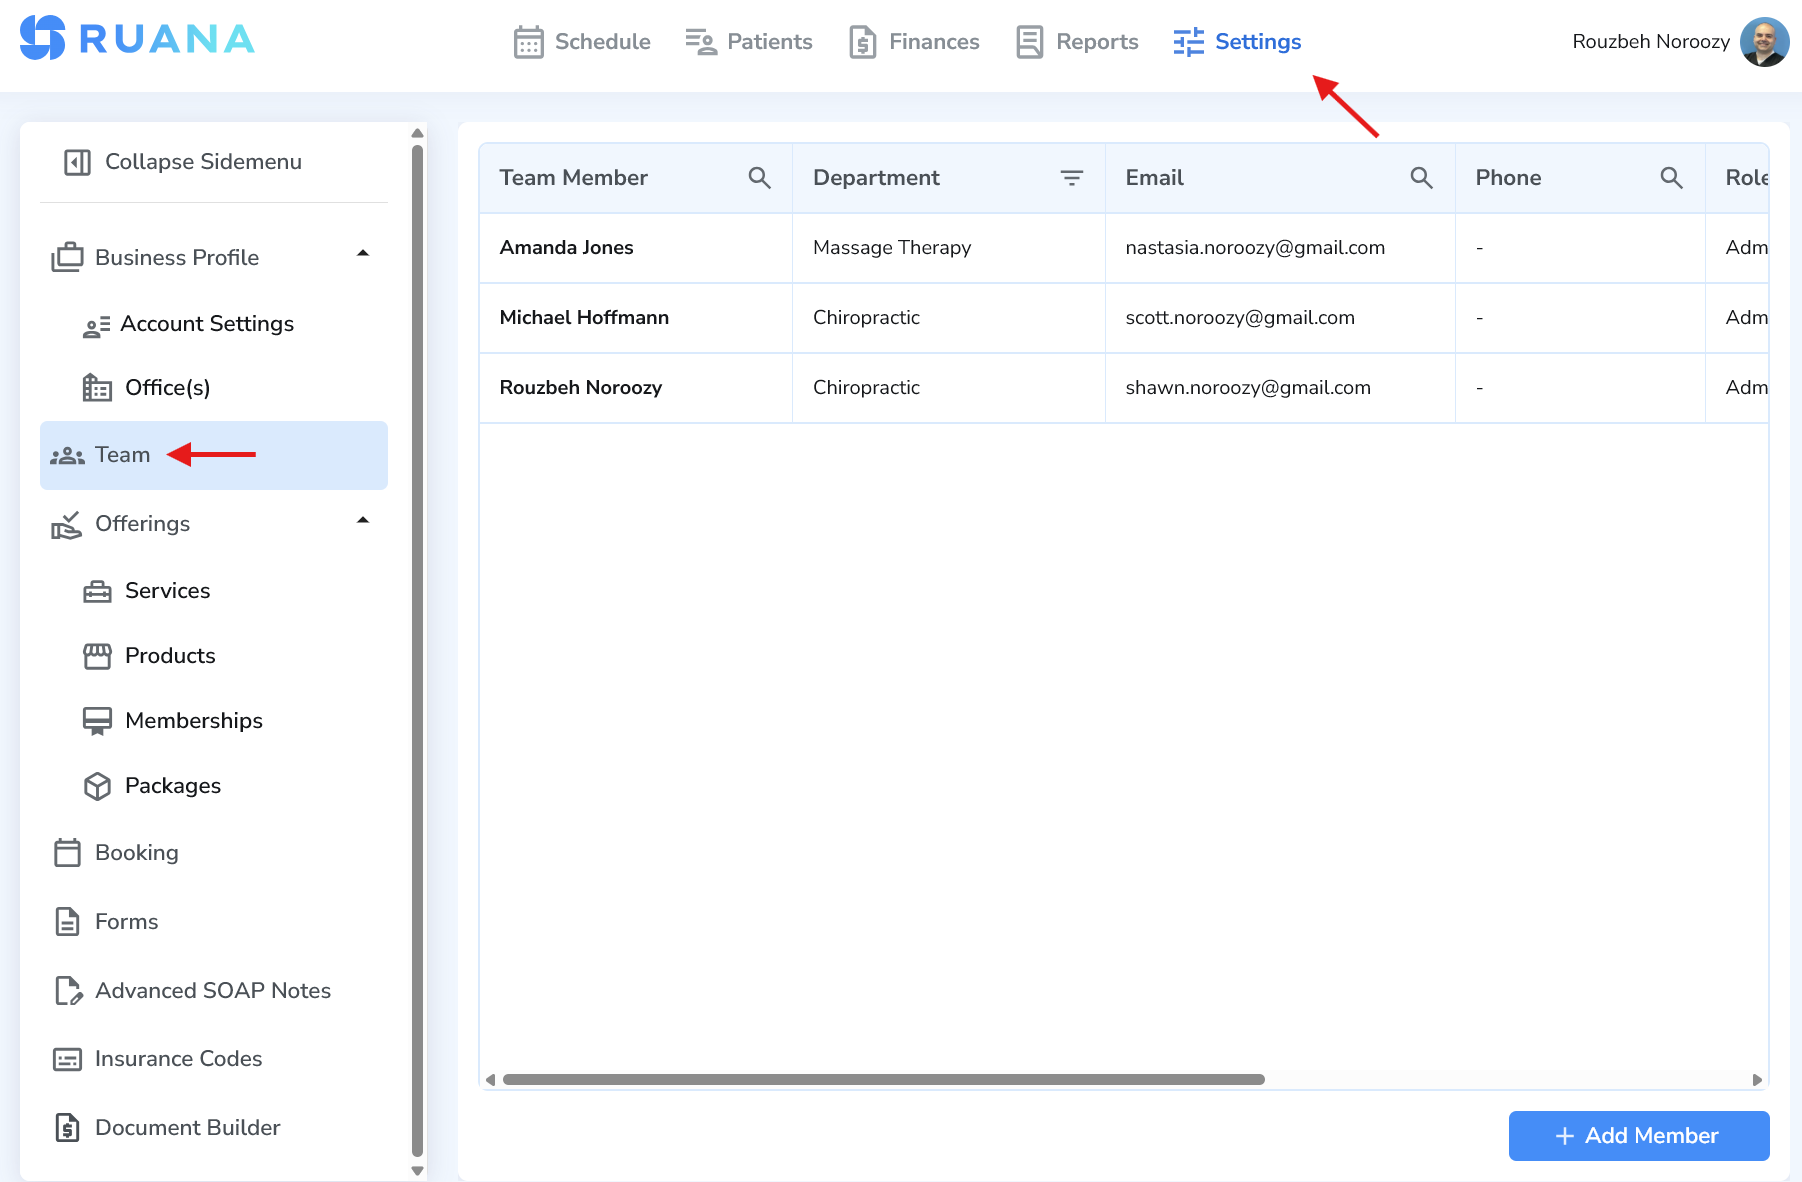
Where to find Team settings
- Click Settings in the top navigation
- Open Business Profile
- Select Team
- Click Add Team Member
How to add a team member
- Go to Settings → Business Profile → Team
- Click Add Team Member
- Enter the team member’s Name and Email
- Select a Role (Admin, Practitioner, Front-desk)
- Create or select a Department (very important for practitioners)
- Click Save
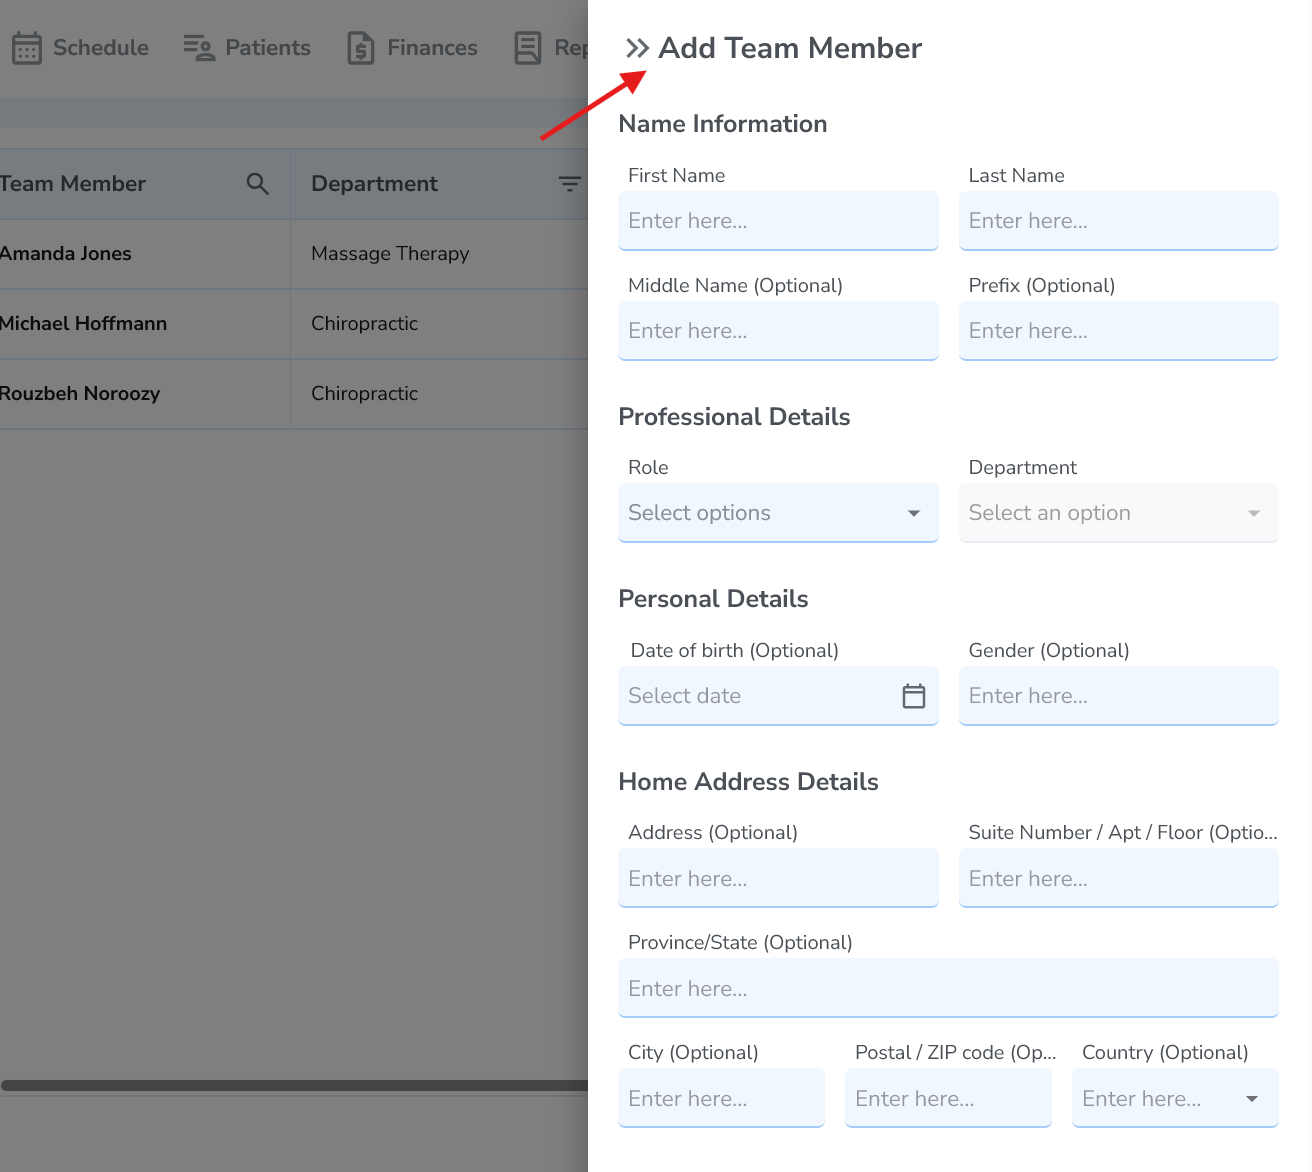
Most important fields
The most important items to complete are:
- First Name and Last Name
- Email (the invitation is sent here)
- Role (Admin, Practitioner, Front-desk)
- Department (required for practitioners)
Common mistake: using the wrong email
If the email is incorrect, the user will not receive the invitation. Double-check spelling before you click Save.
Roles explained
Admin
Admins have the highest level of access. They can manage clinic settings, users, permissions, and system configuration. Admins can also reset passwords, restrict access, and deactivate accounts.
Practitioner
Practitioners provide care and create clinical documentation. They must be assigned to a department. Practitioners add a signature so they can sign charts and clinical files.
Front-desk
Front-desk users typically manage scheduling, patient check-in, and basic administrative tasks. They do not have access to clinical documentation.
Creating and assigning departments
Departments help organize your clinic by service type (for example Chiropractic or Massage Therapy). If your department does not exist yet, you can create it directly from the dropdown.
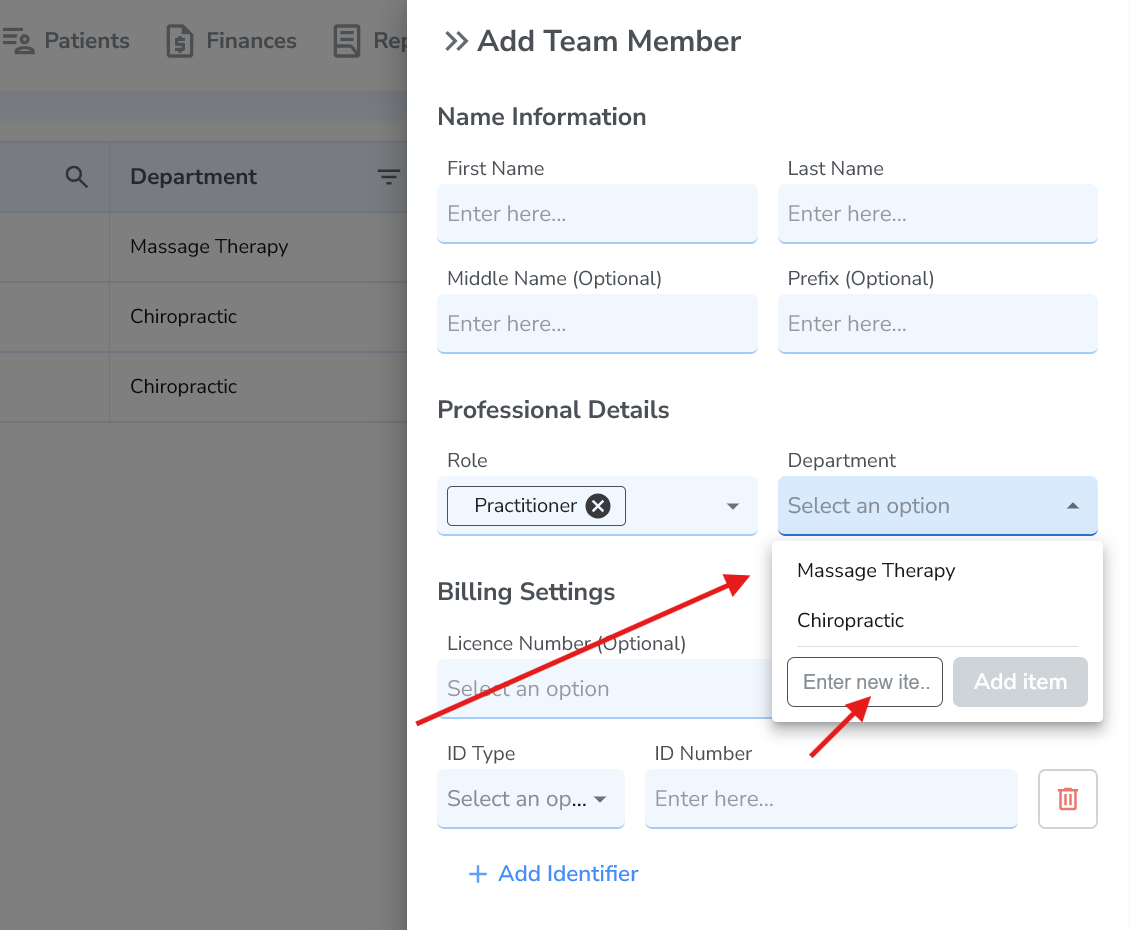
How to create a department
- Click the Department dropdown
- Type the department name into the field labeled Enter new item
- Click Add item
- Select the newly created department for the team member
Best practice: keep departments simple
Most clinics start with a few departments (example: Chiropractic, Massage Therapy, Mental Health) and expand later if needed.
What happens after saving
After you click Save, the team member will receive an invitation email. They will:
- Create their own password
- Log in to Ruana
- Practitioners will add a signature for signed charts and files
If the user didn’t receive the email
Ask them to check spam/junk folders and confirm the email address in the Team list. Admins can resend invitations or reset access as needed.
Add a practitioner signature
Practitioners and therapists should add a signature in Ruana so they can sign charts and clinical documentation properly.
Option 1: The practitioner adds their own signature
- The practitioner logs into their Ruana account
- Open their profile and click Edit Personal Info
- Scroll to the Signature section
- Sign directly on the screen using mouse/trackpad OR click Upload to upload a signature file
- Click Save
Option 2: An admin adds the signature
- Go to Settings
- Click Team
- Select the team member’s name
- Inside the Employee Info tab, find the Account Actions box
- Click Edit Personal Info
- Scroll to the Signature section
- Sign directly on the screen OR upload a signature file
- Click Save
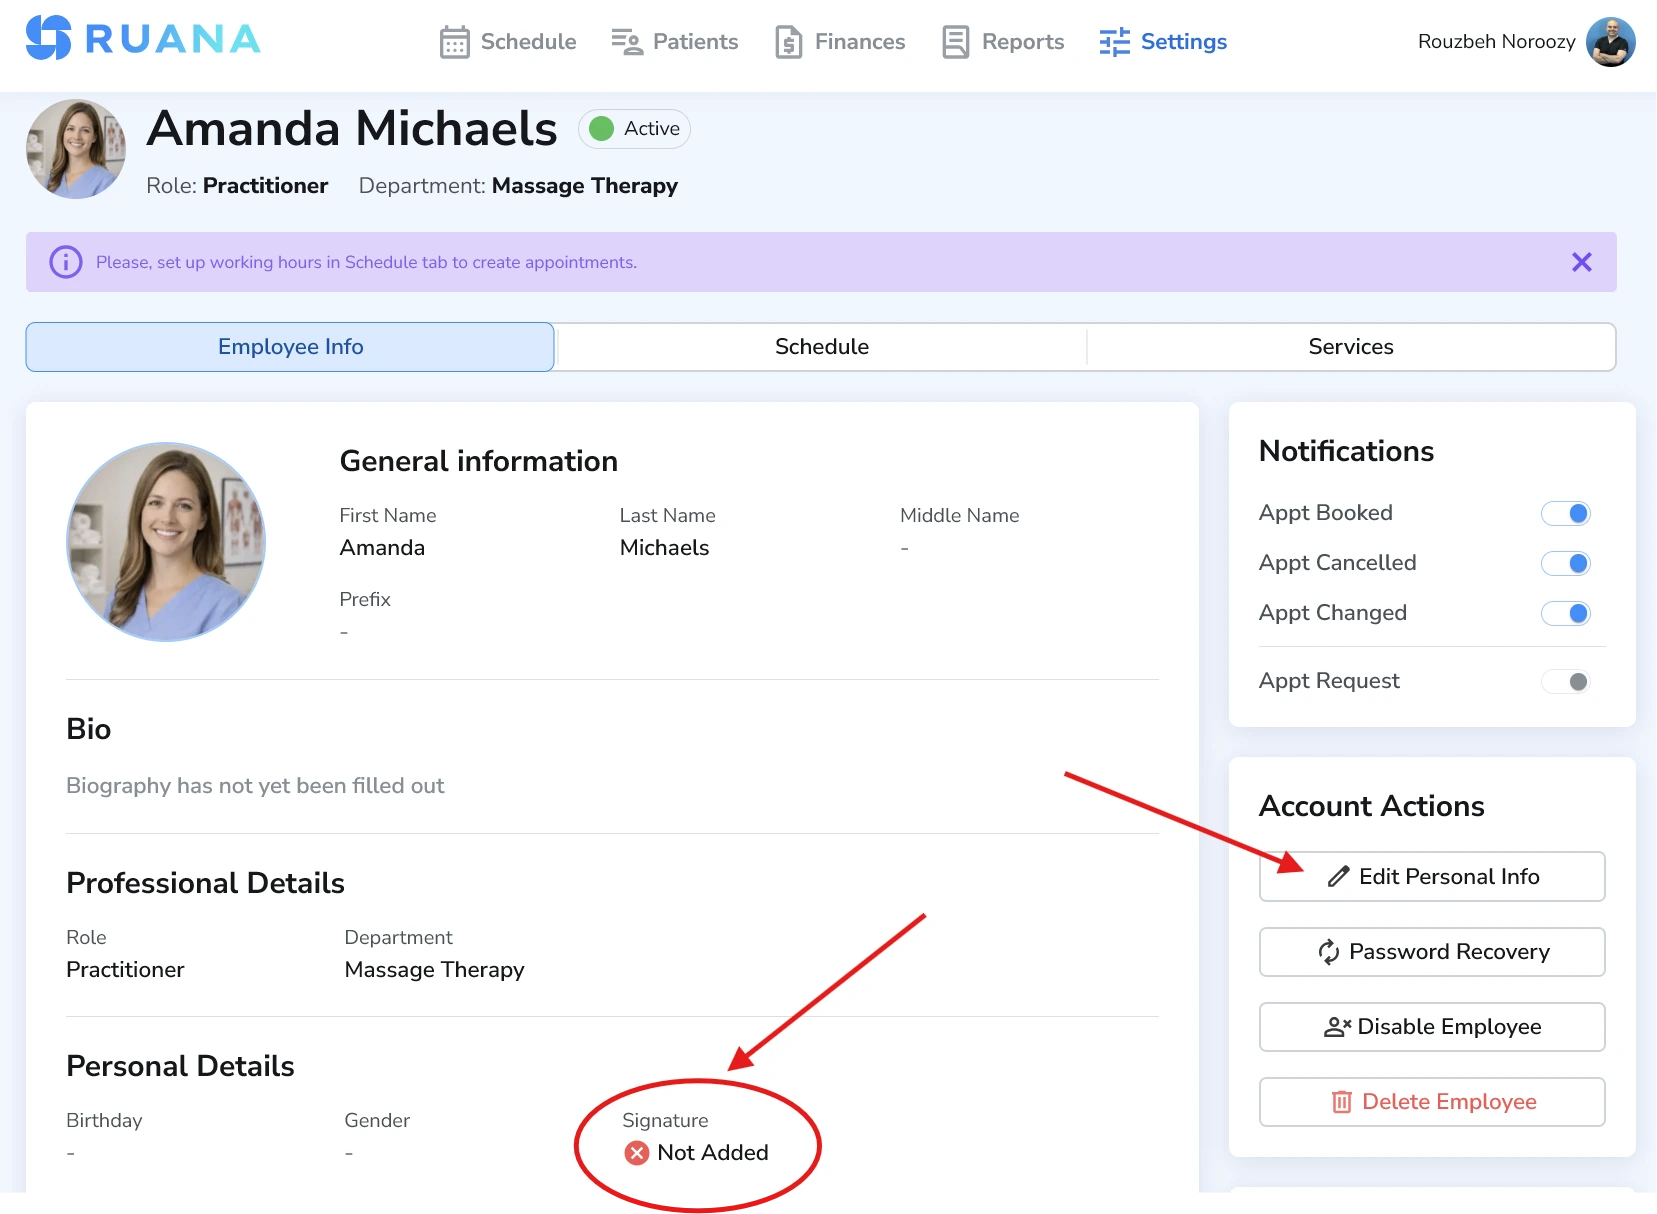
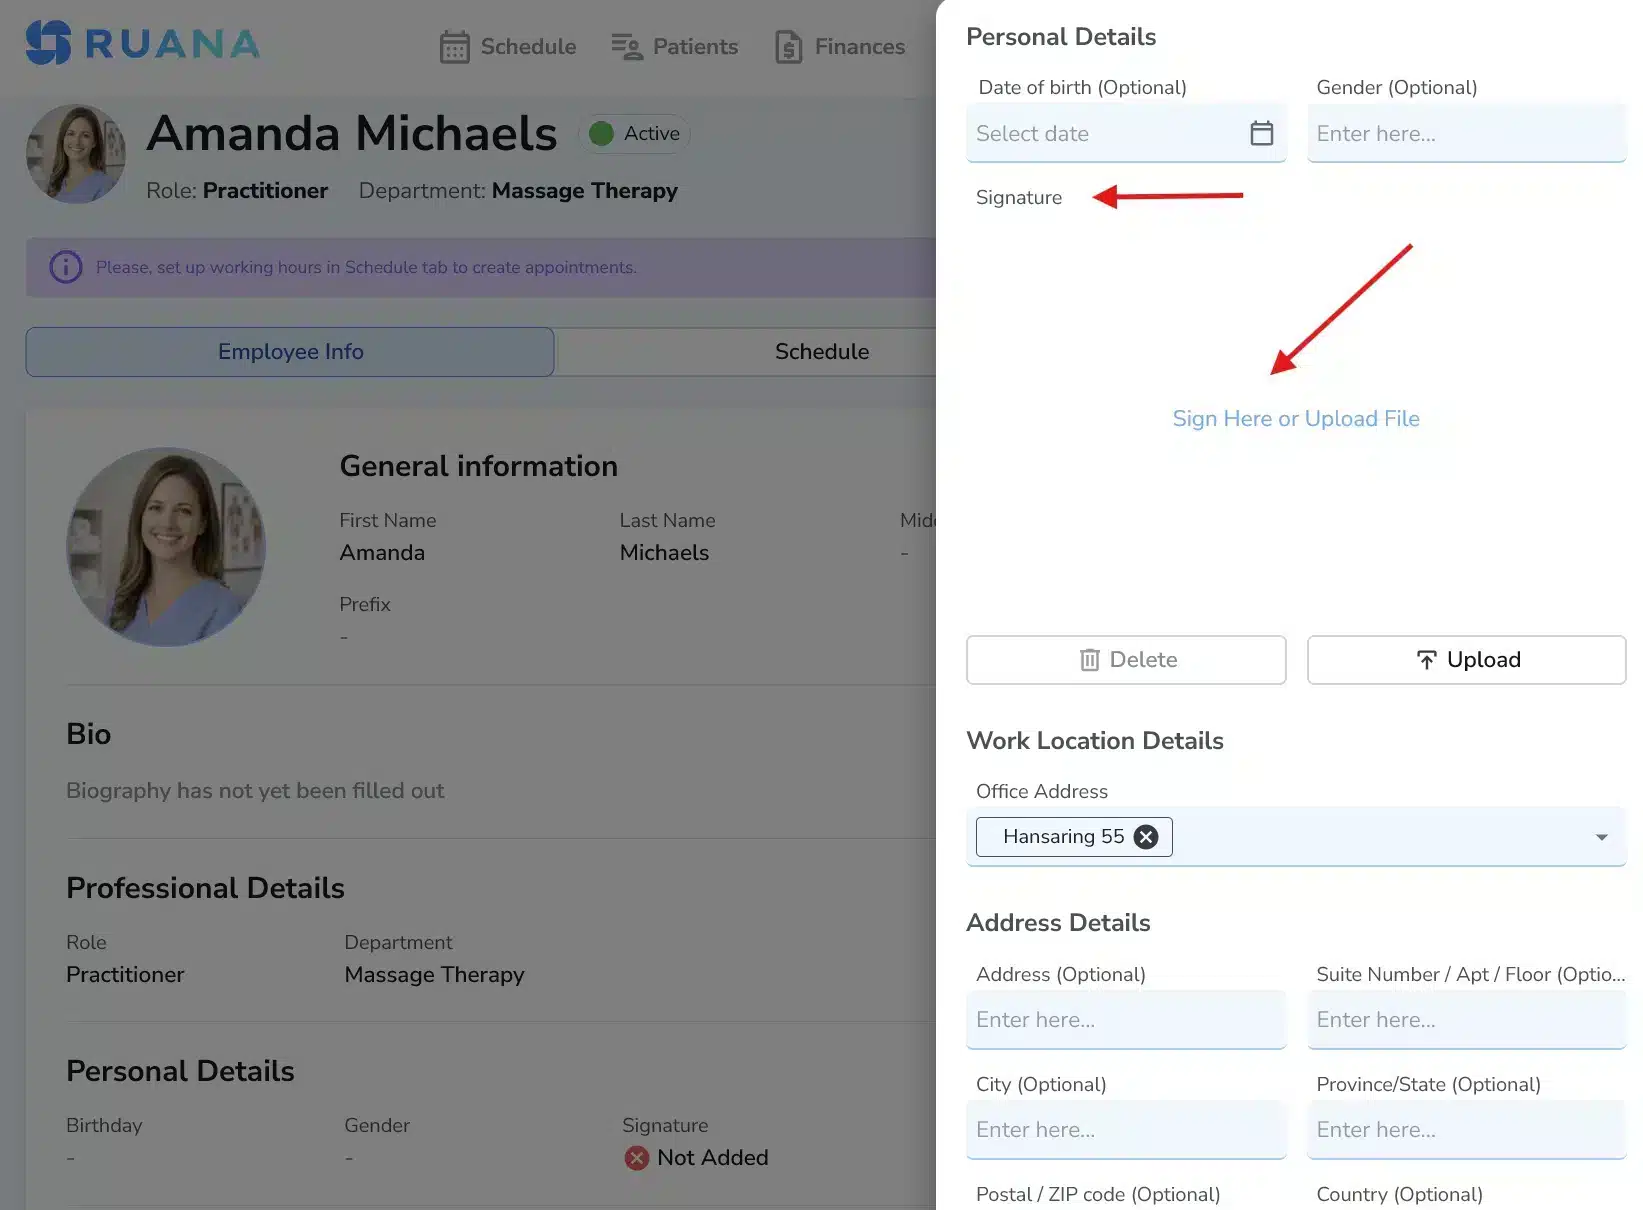
Important
Without a signature added, the practitioner will not be able to properly sign clinical charts and documentation. We recommend adding the signature immediately after account creation.
Important: Configure practitioner schedule & booking interval
After adding a Practitioner, there are two additional steps required before patients can book them online:
1️⃣ Set Working Hours
- Go to Settings
- Click Team
- Select the Practitioner
- Open the Schedule tab
- Click Edit Working Hours
- Set start and end times for each working day
- Add breaks if needed
- Click Save


If working hours are not set, the practitioner will not appear available for booking.
2️⃣ Set Online Booking Interval (Time Slot Duration)
The Online Booking Interval controls how frequently time slots appear in the booking calendar. It does not control appointment length.
Example:
- If set to 20 minutes → 9:00, 9:20, 9:40
- If set to 30 minutes → 9:00, 9:30, 10:00
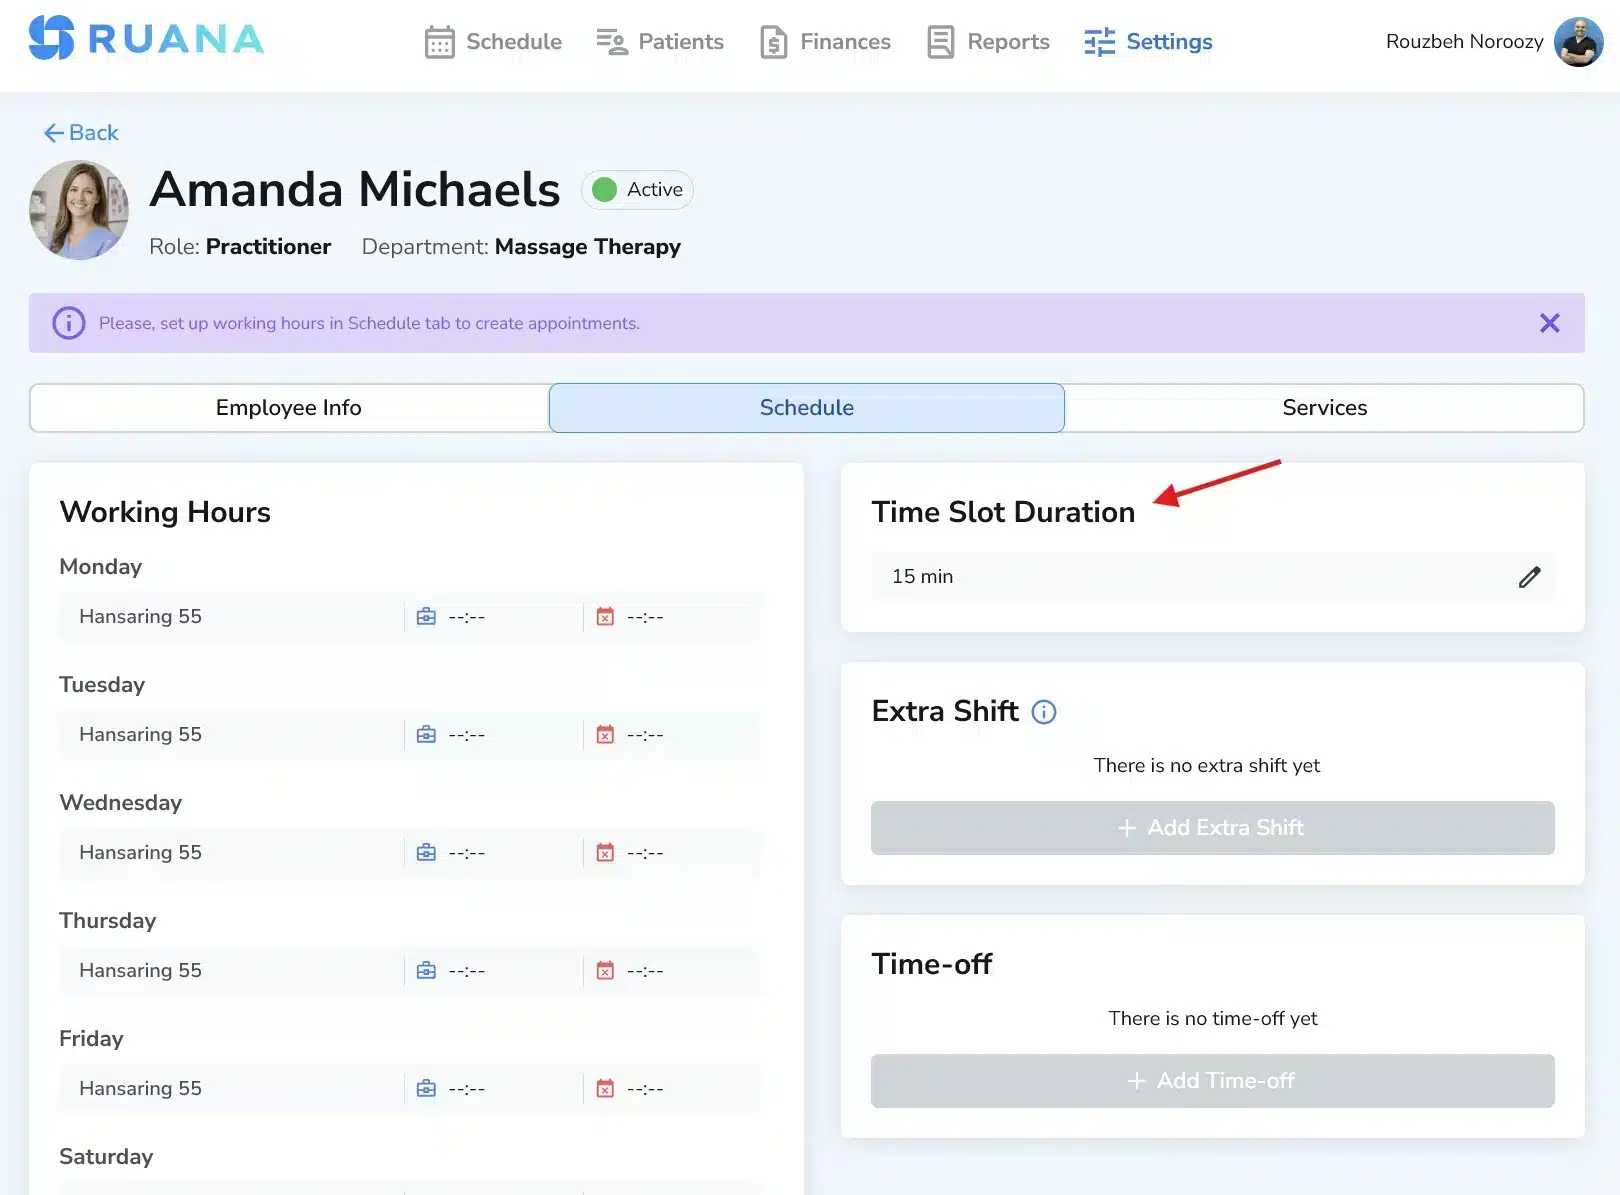
Appointment length is controlled inside Services (Step 4), not here.
Very important
Working Hours, Service Duration, and Online Booking Interval are three separate settings. All must be configured correctly for booking to function properly.
Managing access (admin controls)
Admins can safely manage user accounts at any time. If roles or access levels need to change later, you can update them without risk.
- Reset passwords for any user
- Restrict access or change permissions
- Deactivate and reactivate accounts
Best practices and common mistakes
- Double-check email addresses before saving (invitations depend on email accuracy).
- Create departments early so practitioners can be assigned correctly.
- Assign roles carefully to match responsibilities (Admin vs Practitioner vs Front-desk).
- Ask practitioners to add their signature before their first patient visit.
- Set working hours and booking interval for each practitioner so they become bookable online.
- Admins can always adjust access later, so start simple and refine as your clinic grows.
What’s next
Next, continue with Step 4: Create services and offerings so patients can be booked and billing items are ready.
FAQ
Can I change a team member’s role later?
Yes. Admins can update roles and permissions at any time.
Do practitioners need a department?
Yes. Assigning a department helps organize services and workflows by care type (e.g., Chiropractic, Massage Therapy).
Why does a practitioner need a signature?
The signature is used to sign off on charts and clinical files for proper documentation workflows.