
Step 7: Set up your online booking page in Ruana
In this step, you’ll configure your public booking page, generate your booking link, and control what patients can book (office, department, practitioner, service) — plus rules like same-day booking and cancellation/reschedule settings.
Why this matters: Your booking settings determine whether patients can book instantly, whether you accept appointment requests, which services appear online, and what happens after a booking is made. Correct setup prevents wrong appointments, wrong locations, and unwanted schedule changes.
▶️ Watch first: Booking page setup (General + Layout)
(4 minute walkthrough: enable booking, copy link, set redirect URL, booking rules, and layout settings)
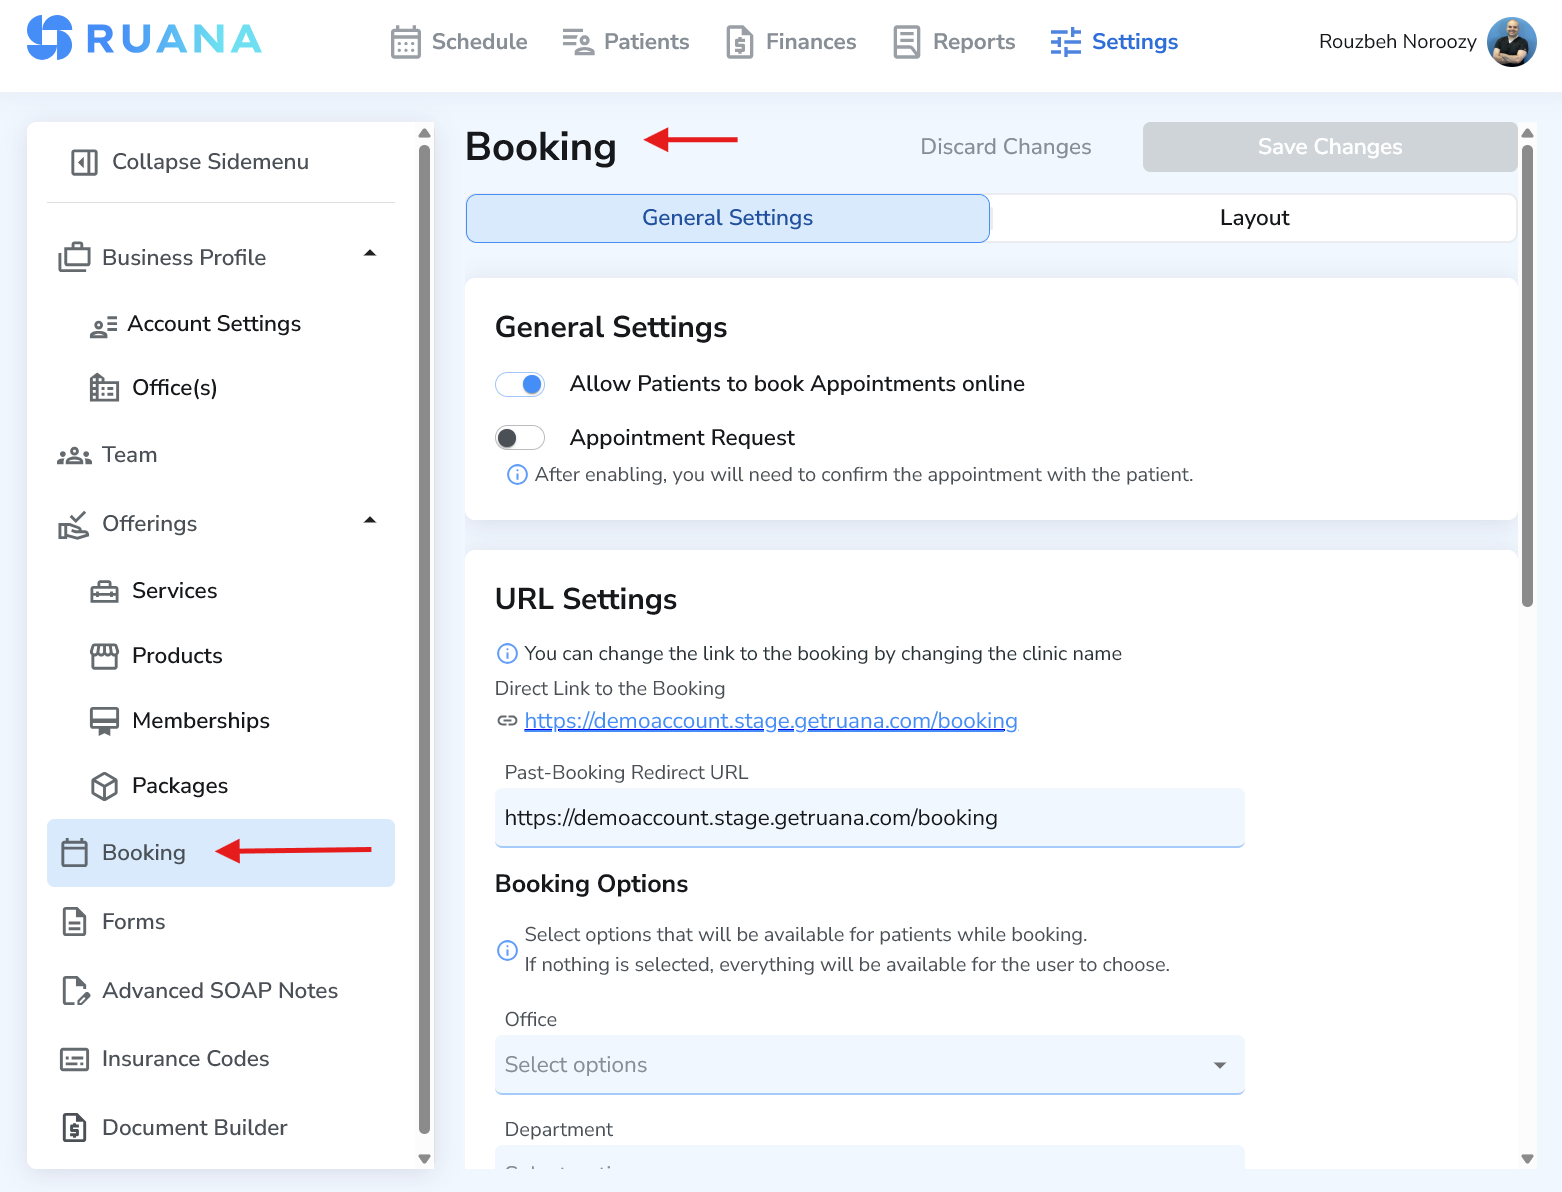
Where to find Booking settings
Navigate to:
Top menu → Settings
Left sidebar → Booking
1) General Settings: Enable online booking (or appointment requests)
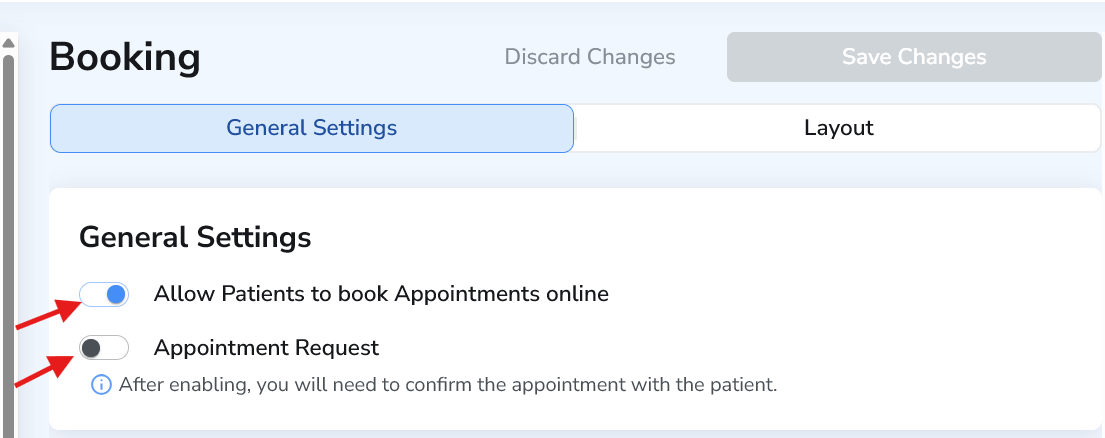
At the top of the General Settings tab, you’ll see the switch: Allow patients to book appointments online.
- Turn ON to allow patients to book instantly on your public booking page.
- If you prefer to manually approve bookings, turn on Appointment Request as well. With appointment requests enabled, you’ll confirm the appointment before it becomes final.
Tip: Appointment Requests are great for clinics that want more control (new patient screening, limited availability, or special intake requirements) before confirming appointments.
2) URL Settings: Copy your booking link (and set the redirect URL)
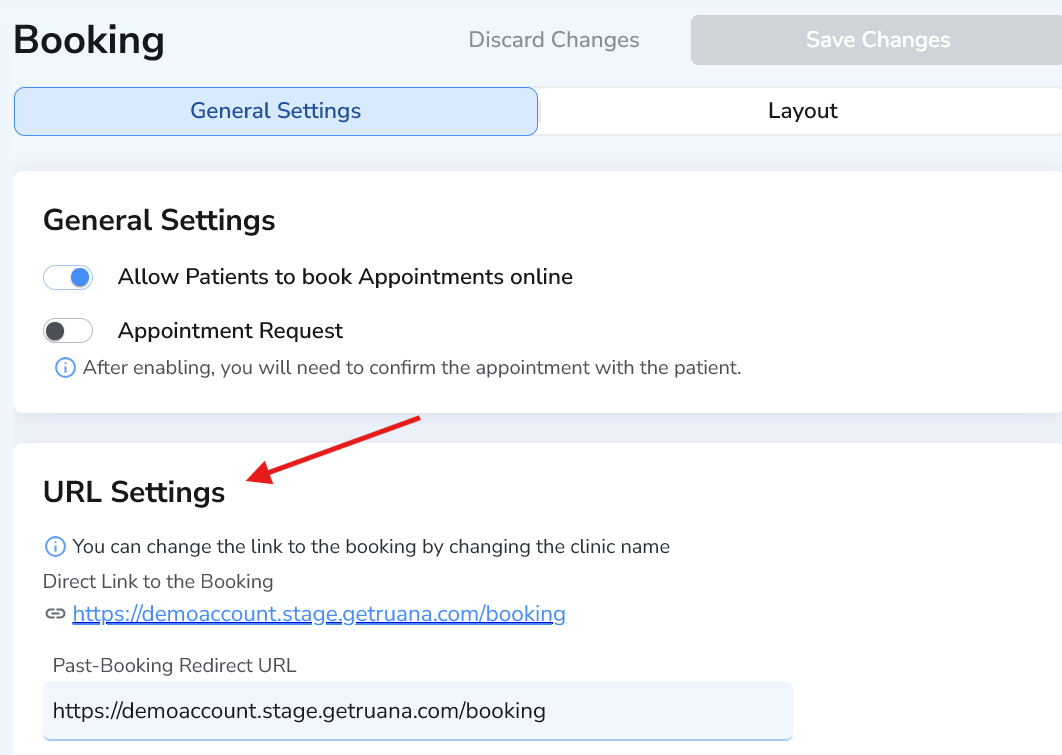
In URL Settings, Ruana displays your Direct Link to the Booking. This is the link you can paste into: your website “Book Now” button, Instagram bio, Google Business Profile, emails, and ads.
Very important: Right under the direct link is Past-Booking Redirect URL. This controls where a patient goes after they finish booking.
- Recommended (simple): paste the same booking link so the patient stays on the booking page.
- Alternative: paste your website homepage (or a thank-you page) so the patient is redirected back to your site.
3) Booking Options: Control what patients can see and book
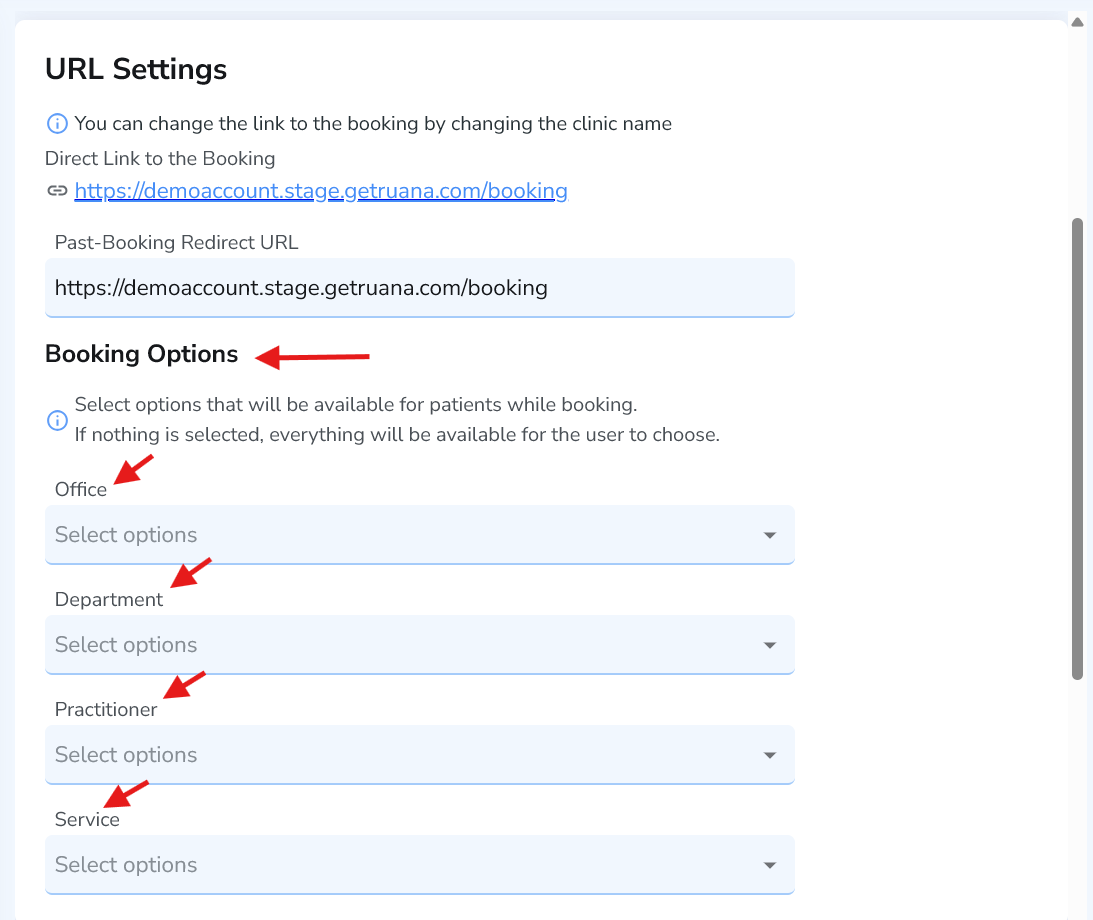
Under Booking Options, you can restrict what appears on your booking page by selecting: Office, Department, Practitioner, and/or Service.
- If you leave these blank, the system typically shows everything available.
- If you select options, your booking page becomes more curated (recommended for multi-service clinics).
4) URL Builder: Create custom booking links (optional)
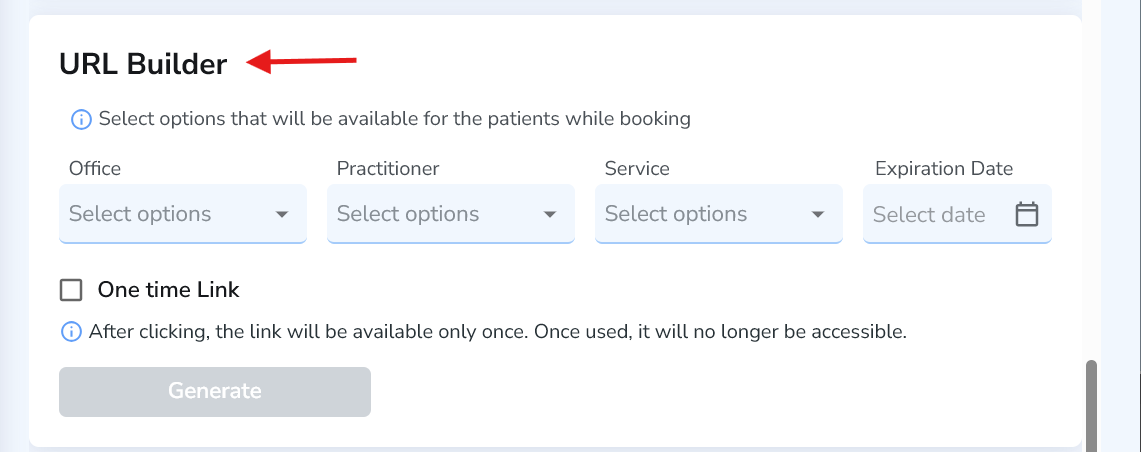
If you want custom booking links (for example, a link that only shows “Massage Therapy” or only a specific practitioner), use the URL Builder section.
- Select Office, Practitioner, and Service (and an optional Expiration Date).
- Use One time Link if you want a link that works only once (useful for special cases).
- Click Generate to create the custom link.
5) Booking Settings: Same-day booking + cancel/reschedule rules
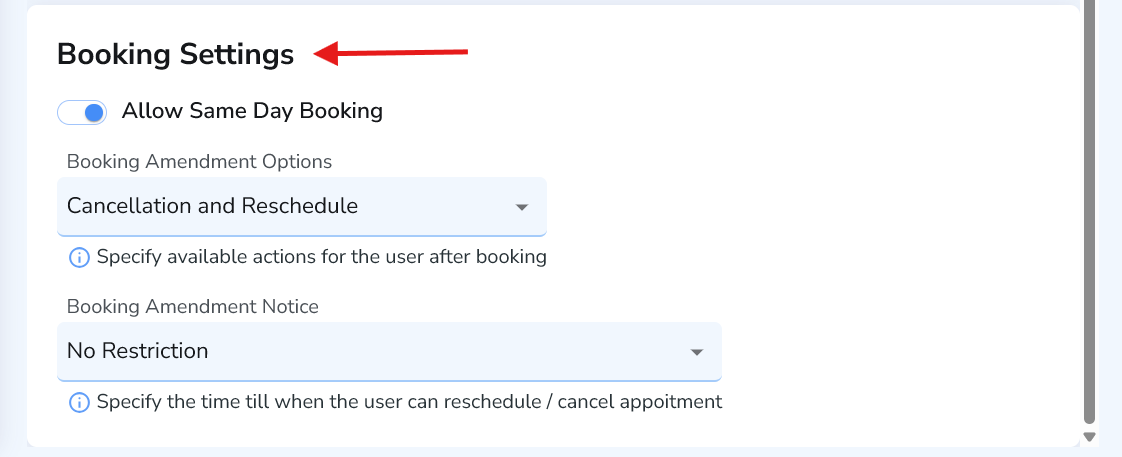
In Booking Settings, you control what patients are allowed to do after booking:
- Allow Same Day Booking — enable if you want patients to book appointments on the same day.
- Booking Amendment Options — choose whether patients can reschedule, cancel, both, or neither.
- Booking Amendment Notice — restrict changes to a certain time window (example: no changes within 12 hours).
Best practice: If your clinic has high demand or tight scheduling, consider limiting cancellations/reschedules to reduce last-minute gaps. Many clinics use 12–24 hours as a common restriction window.
6) Layout tab: Customize how your booking page looks
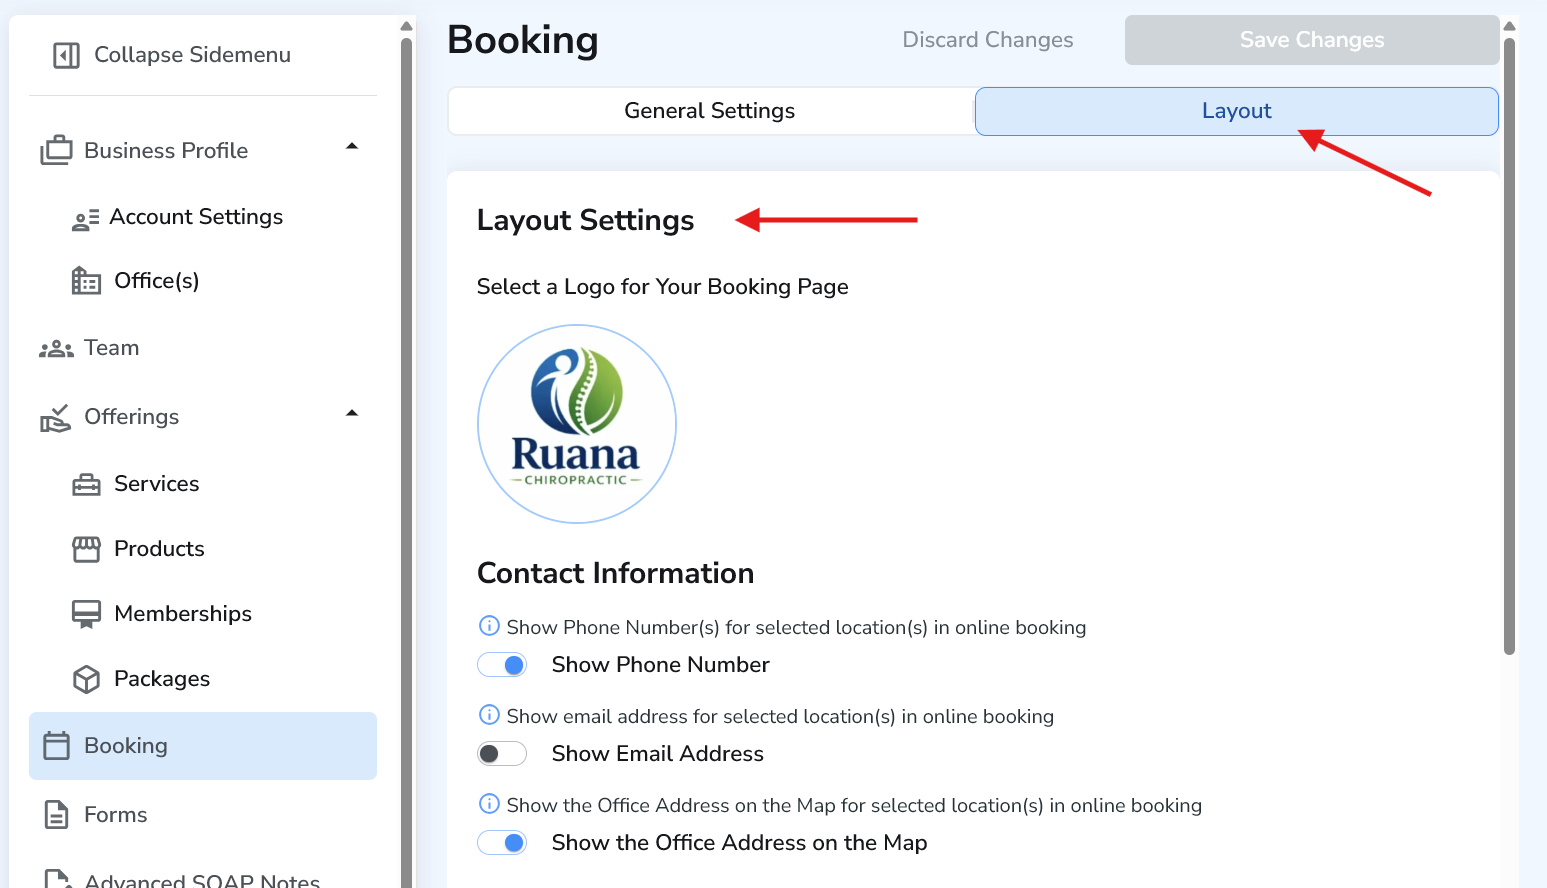
At the top of the Booking page, click the Layout tab to control what patients see on your booking page:
- Upload your logo (recommended for professionalism and trust).
- Choose whether to show: phone, email, address, office hours, and timezone.
- Choose whether to show: service prices and service duration (if enabled in your workflow).
- Add a custom message (example: “Please arrive 15 minutes before your appointment.”).
7) Save your changes (don’t skip this)
After making changes in General Settings or Layout, click Save Changes at the top. If you leave the page without saving, your booking page may not update.
Quick checklist: Booking enabled ✅ • Correct booking link copied ✅ • Redirect URL set ✅ • Booking rules set ✅ • Layout customized ✅ • Saved ✅
Best practices & common mistakes
- Forgetting Past-Booking Redirect URL: Set it so the patient lands somewhere sensible after booking.
- Not restricting Booking Options: Multi-department clinics should filter options to avoid confusing patients.
- No cancellation rules: Decide early if patients can cancel/reschedule and how close to the appointment.
- Not saving changes: Always click Save Changes at the top after updates.
FAQ
Can I use Ruana without public online booking?
Yes. You can keep booking turned off and schedule patients internally. You can also use Appointment Request if you want approvals.
Where should I place my booking link?
Website “Book Now” button, Instagram bio, Google Business Profile, email signatures, and SMS campaigns.
Can I create different links for different services?
Yes — use the URL Builder to generate custom links by office/practitioner/service.
What’s next
Next, you’ll typically set up Forms (intake forms, consent forms, health history) so patients can complete paperwork before arrival, and later connect forms to services when needed.