Step 4: Create services in Ruana
A step-by-step guide to building your clinic’s service menu for scheduling and online booking.
Why this matters: Services are the foundation of Ruana scheduling. A service controls who can be booked, where, how long the appointment is, and what patients see on your online booking page.
▶️ Watch first: Creating services and assigning practitioners
(2 minute overview of services, online booking visibility, and the +Assign step)
Overview
In Ruana, a Service is anything a patient can book — for example: chiropractic adjustment, massage session, initial consultation, re-exam, or telehealth visit.
Each service can have its own duration, price, format (In Person vs Online), and can optionally send a form automatically before the visit.
Important: After you fill out the service details, you must click + Assign and then click Save. If you skip + Assign, the service may not be available for booking.
Where to find Services
Go to:
Top menu → Settings
Left sidebar → Offerings → Services
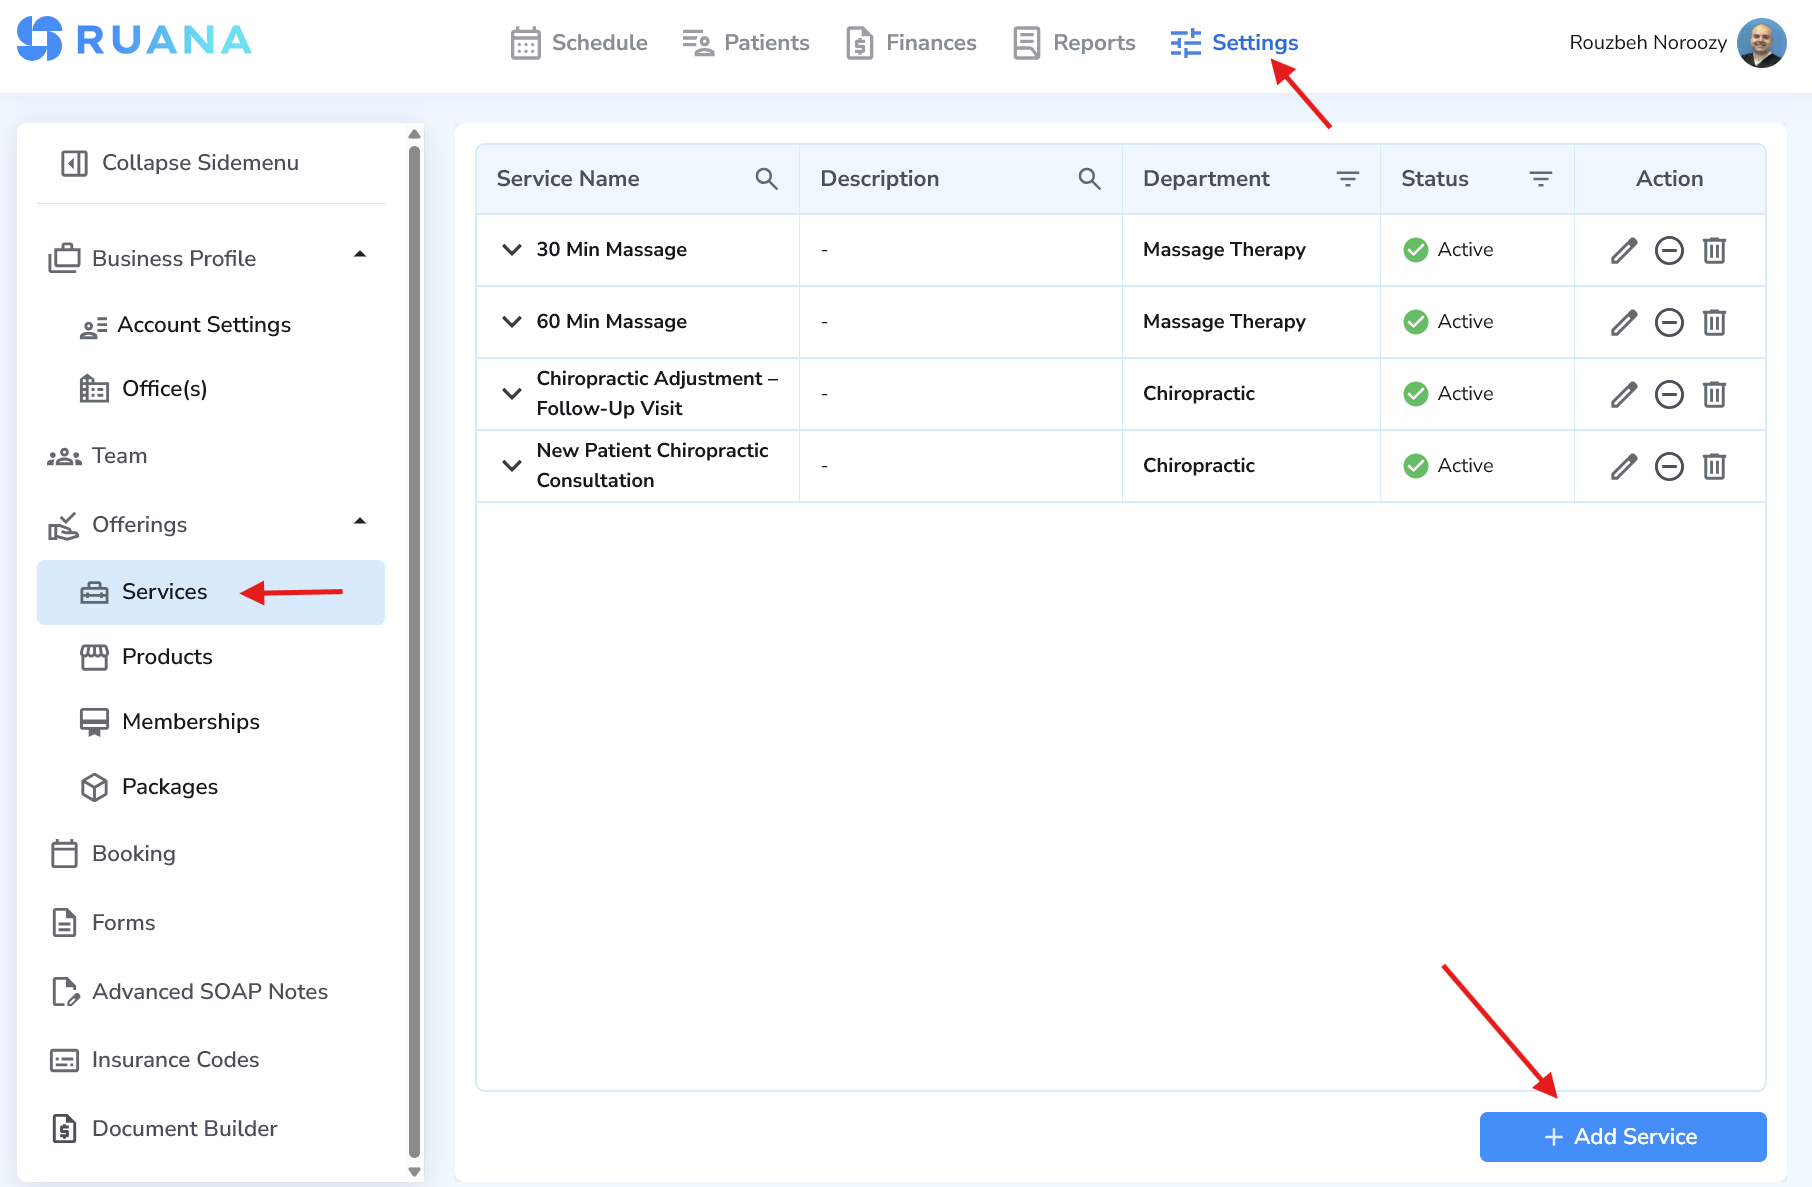
How to create a new service
- Open Settings → Offerings → Services
- Click Add Service
- Fill out Service Details (name, department, booking description, etc.)
- Complete Appointment Specification (format, office, practitioner, duration, price)
- Click + Assign
- Click Save
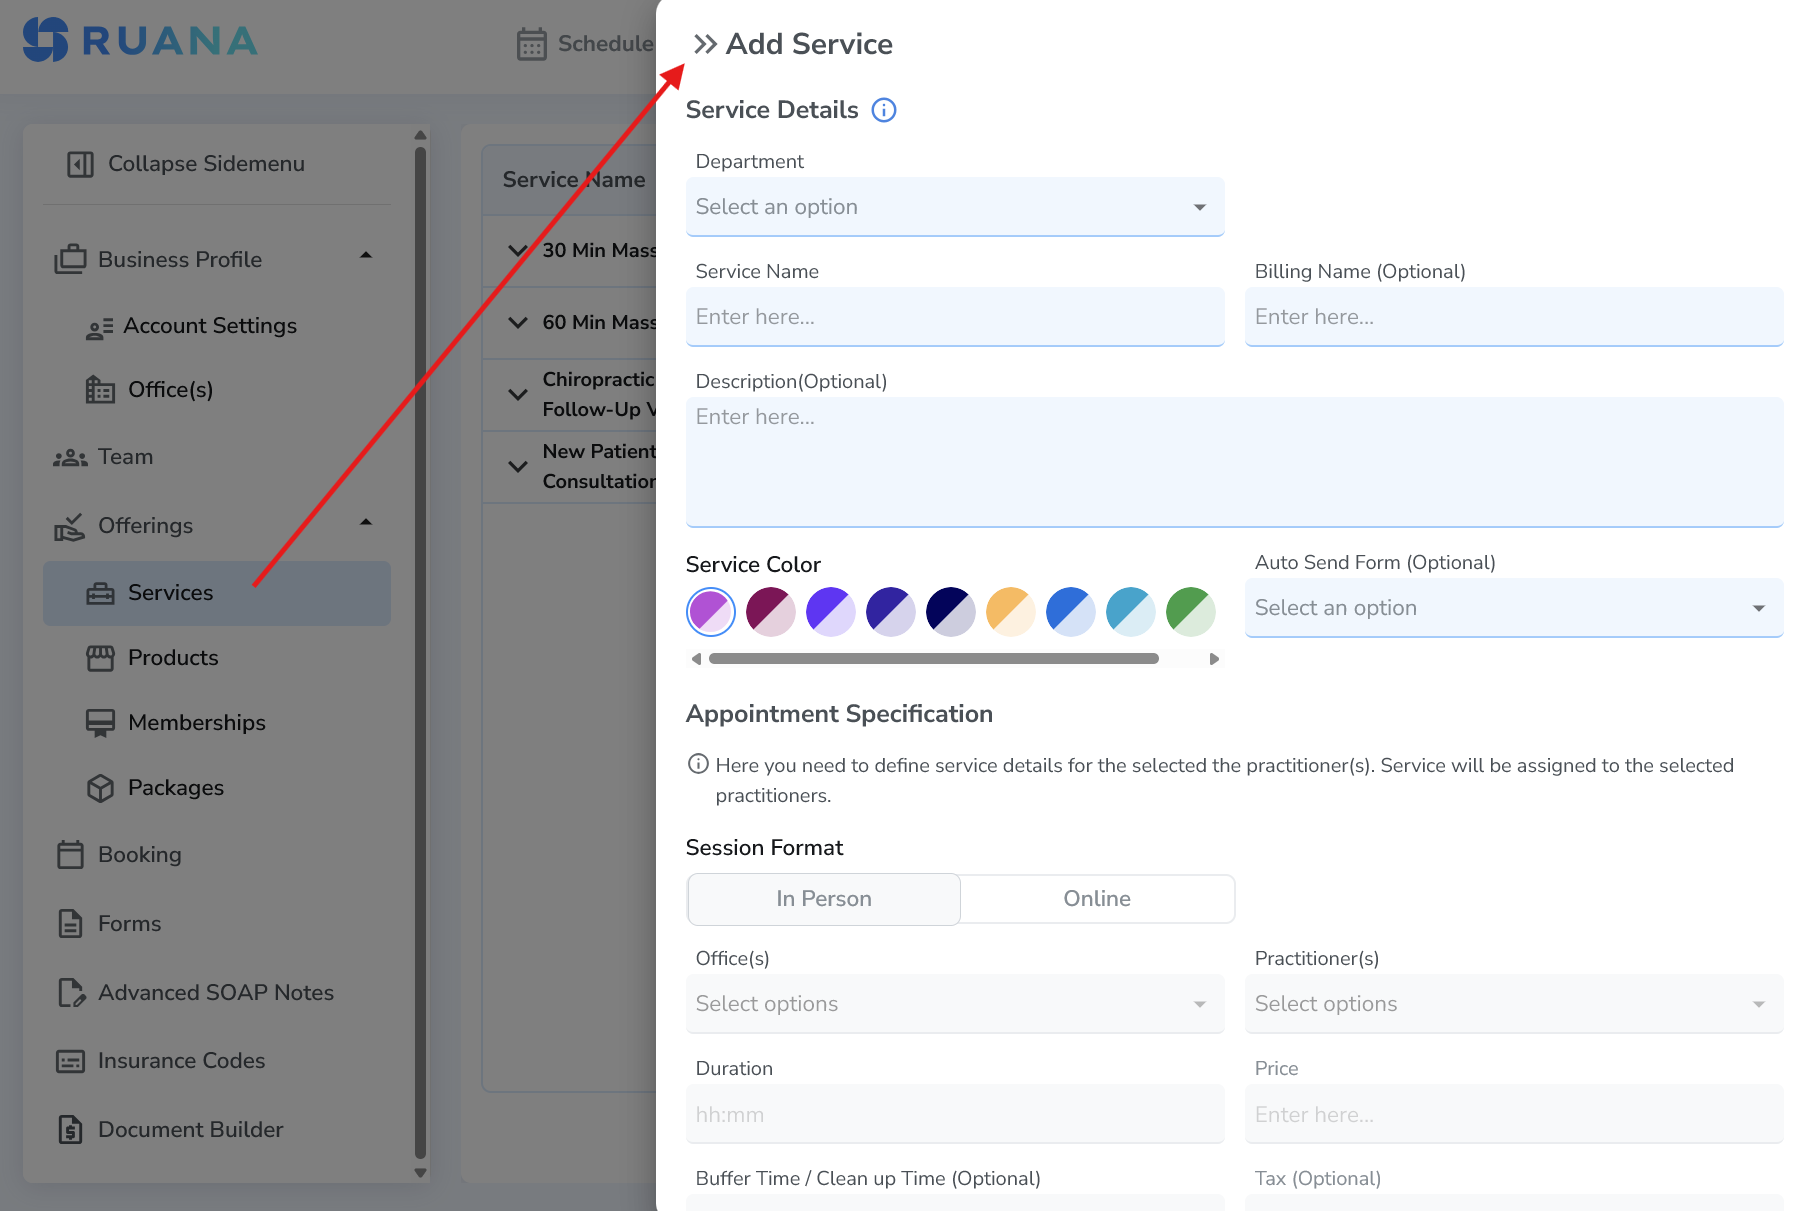
Service Details explained
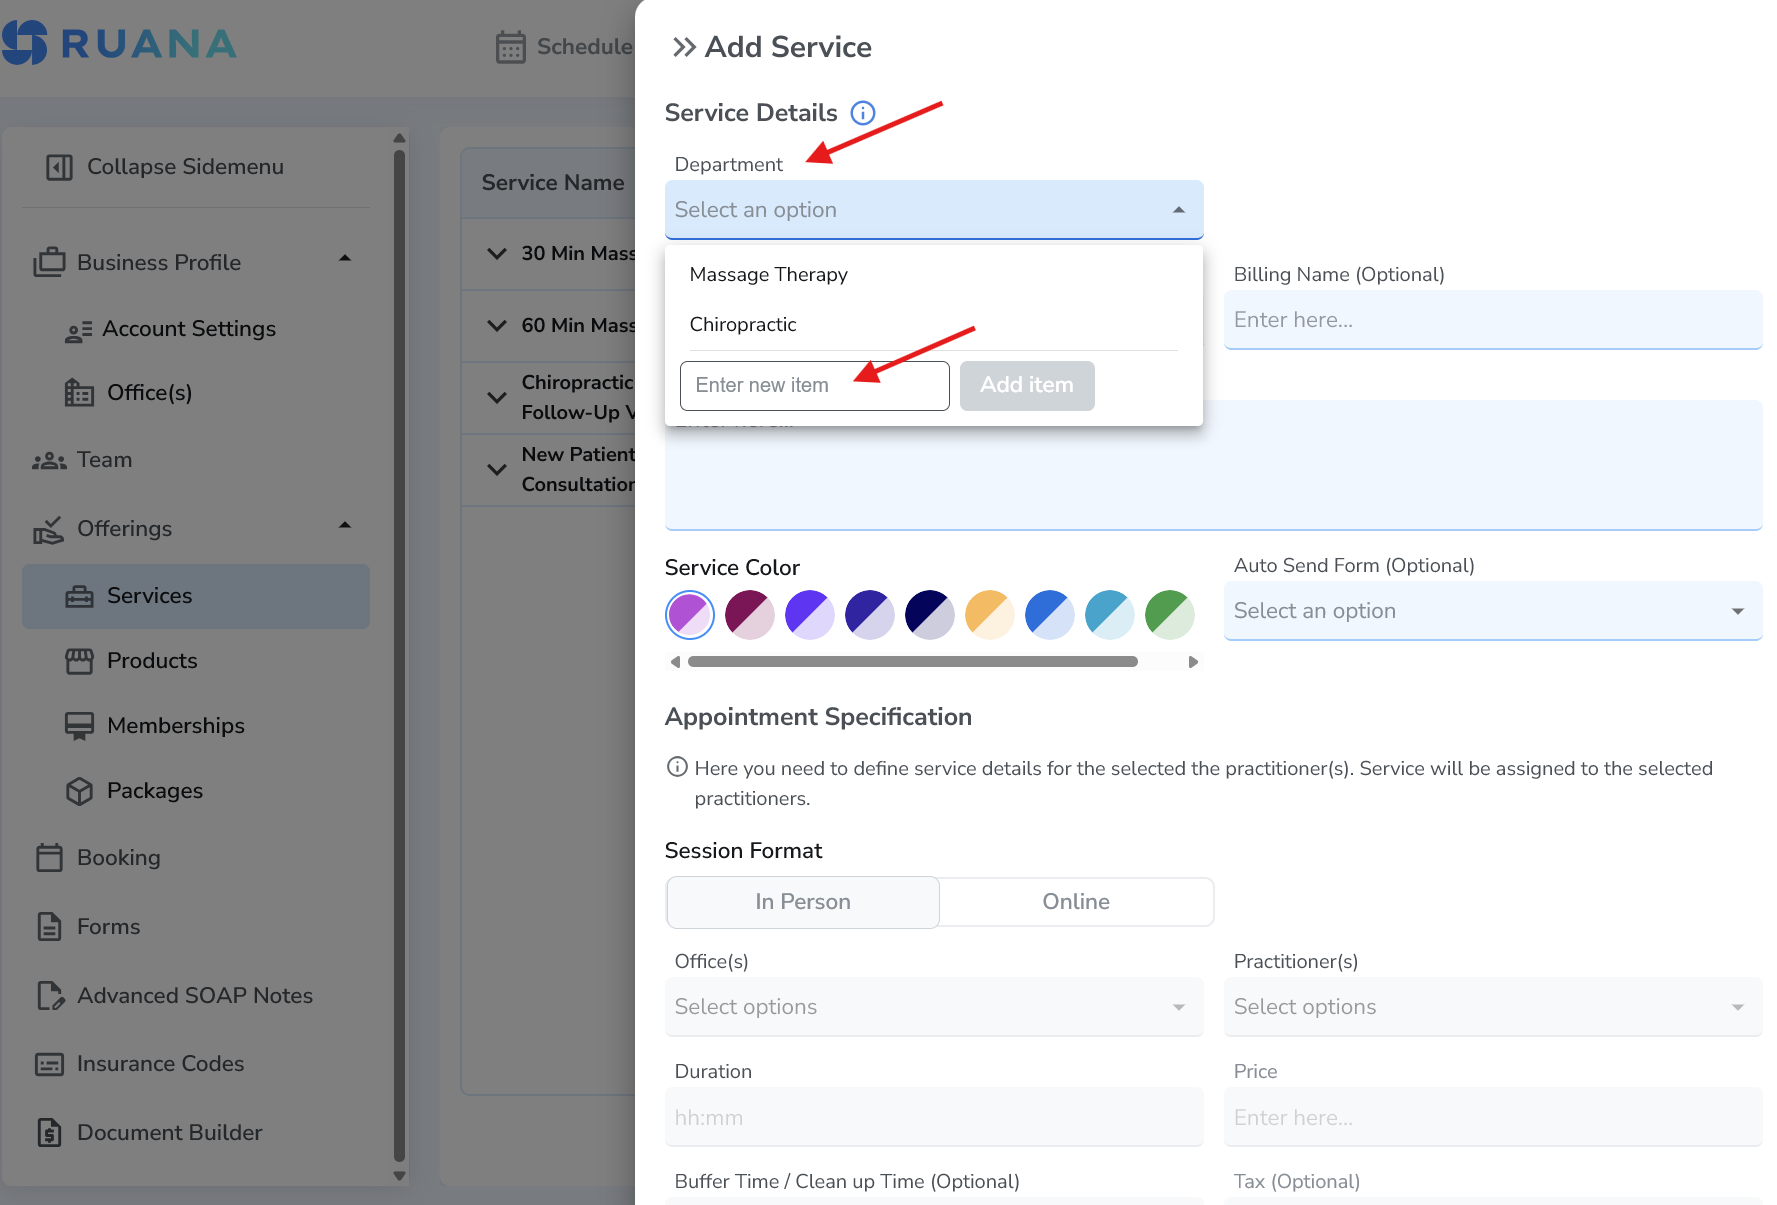
Department
A Department groups services by category (example: Chiropractic, Massage Therapy, Mental Health). Departments help keep your service menu clean, and can make setup easier in multi-disciplinary clinics.
If you don’t have a department yet, you can create one directly inside the dropdown: open the Department dropdown → type a name into Enter new item → click Add item.
Service Name
The Service Name is what patients and staff see in the schedule and booking flow (example: “Initial Consultation – 45 min”).
Billing Name (Optional)
Use Billing Name if you want the internal billing label to differ from the public service name (example: public name “New Patient Visit” but billing name “Initial Evaluation”).
Description (Optional)
This is extremely useful for online booking. Anything you type in Description can show on your booking page, helping patients pick the correct appointment.
Good examples: “Recommended for first-time patients. Includes consultation + exam.” or “Best for ongoing care. Includes adjustment and brief reassessment.”
Service Color
Choose a color so services are easier to recognize in the schedule (especially helpful when you have many appointment types).
Auto Send Form (Optional)
If you have intake or consent forms created, you can automatically send them when a patient books this service.
- If you don’t have forms yet, skip this for now — you can come back later and attach forms anytime.
- When you later create a form, you can also assign it to a service from the Forms area.
Appointment Specification explained
This section determines how the appointment is booked and who it applies to. It’s also where you set the appointment duration and price.
Session Format
Choose In Person for in-clinic visits or Online for telehealth / virtual appointments. This setting helps Ruana organize services correctly for online booking.
Office(s)
Select which office location(s) can offer this service. Tip: If you don’t see an office here, complete Step 2 first (add office locations).
Practitioner(s)
Select which practitioner(s) can perform this service. Tip: If you don’t see a practitioner, complete Step 3 first (add team members).
Duration and Price
Set the Duration of the appointment and (if applicable) the Price. These values affect scheduling availability and what patients see when booking online.
Best practice: Put the time in the service name if it helps patients choose (example: “Massage – 60 minutes”). This reduces wrong bookings and improves your booking conversion rate.
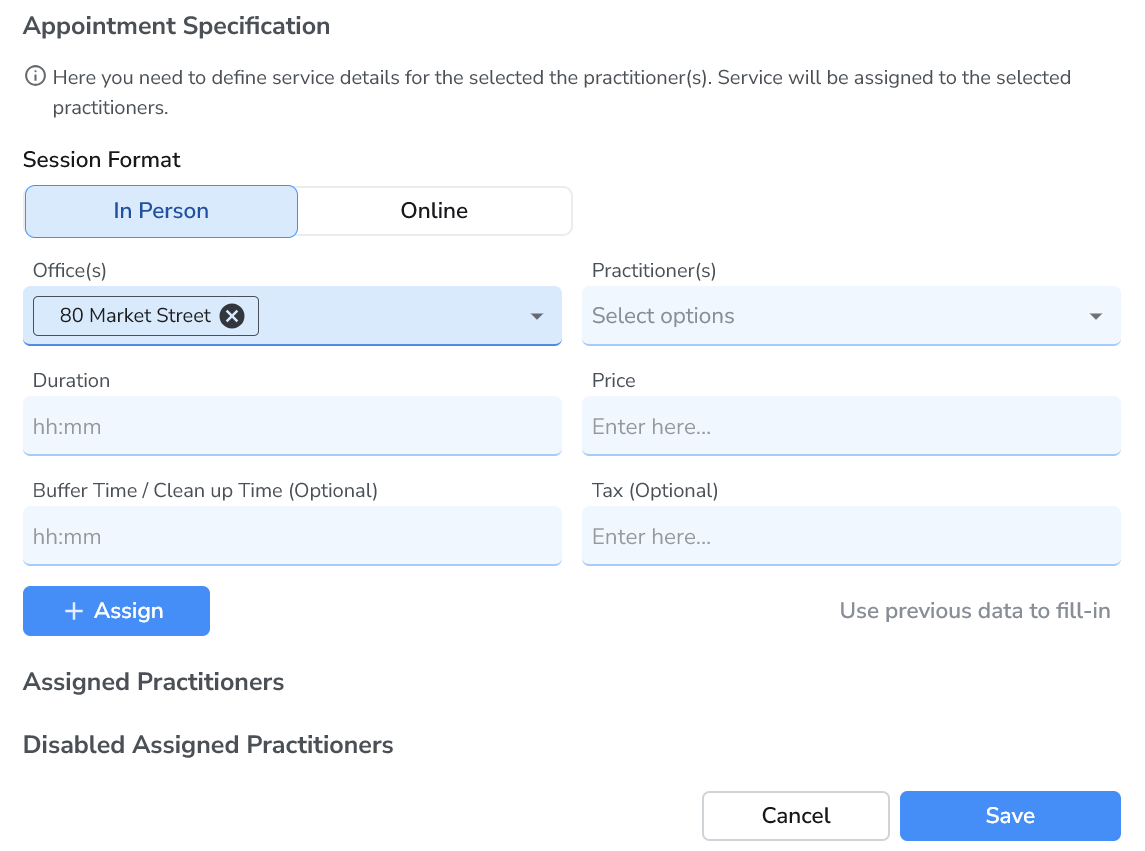
The most common mistake: forgetting “+ Assign”
After filling out the appointment details, click + Assign to attach the service to the selected practitioner(s). Then click Save.
Reminder: No +Assign = the service may not become bookable. Always do + Assign first, then Save.
Tips for a clean service menu (especially for online booking)
- Keep names simple and patient-friendly (example: New Patient Visit vs “NP-EVAL-45”).
- Use the Description field to reduce confusion and wrong bookings.
- Use Departments to group services (Chiropractic, Massage Therapy, etc.).
- Use colors so staff can instantly recognize appointment types on the schedule.
- If you’re not ready for forms yet, skip Auto Send Form and attach later.
What’s next
Next, continue to Step 5 to set up the next core piece of your clinic workflow (example: online booking settings, forms, or billing — depending on your onboarding order).