Step 2: Set up your office locations in Ruana
Office locations define where your clinic operates and when patients can be scheduled. Each office can have its own address, contact details, and working hours. This step is required to make scheduling, booking, and reporting work correctly—especially for multi-location clinics.
▶️ Watch first: Adding and configuring an office location
(2 minute walkthrough: create an office, enter address details, set working hours)
On this page
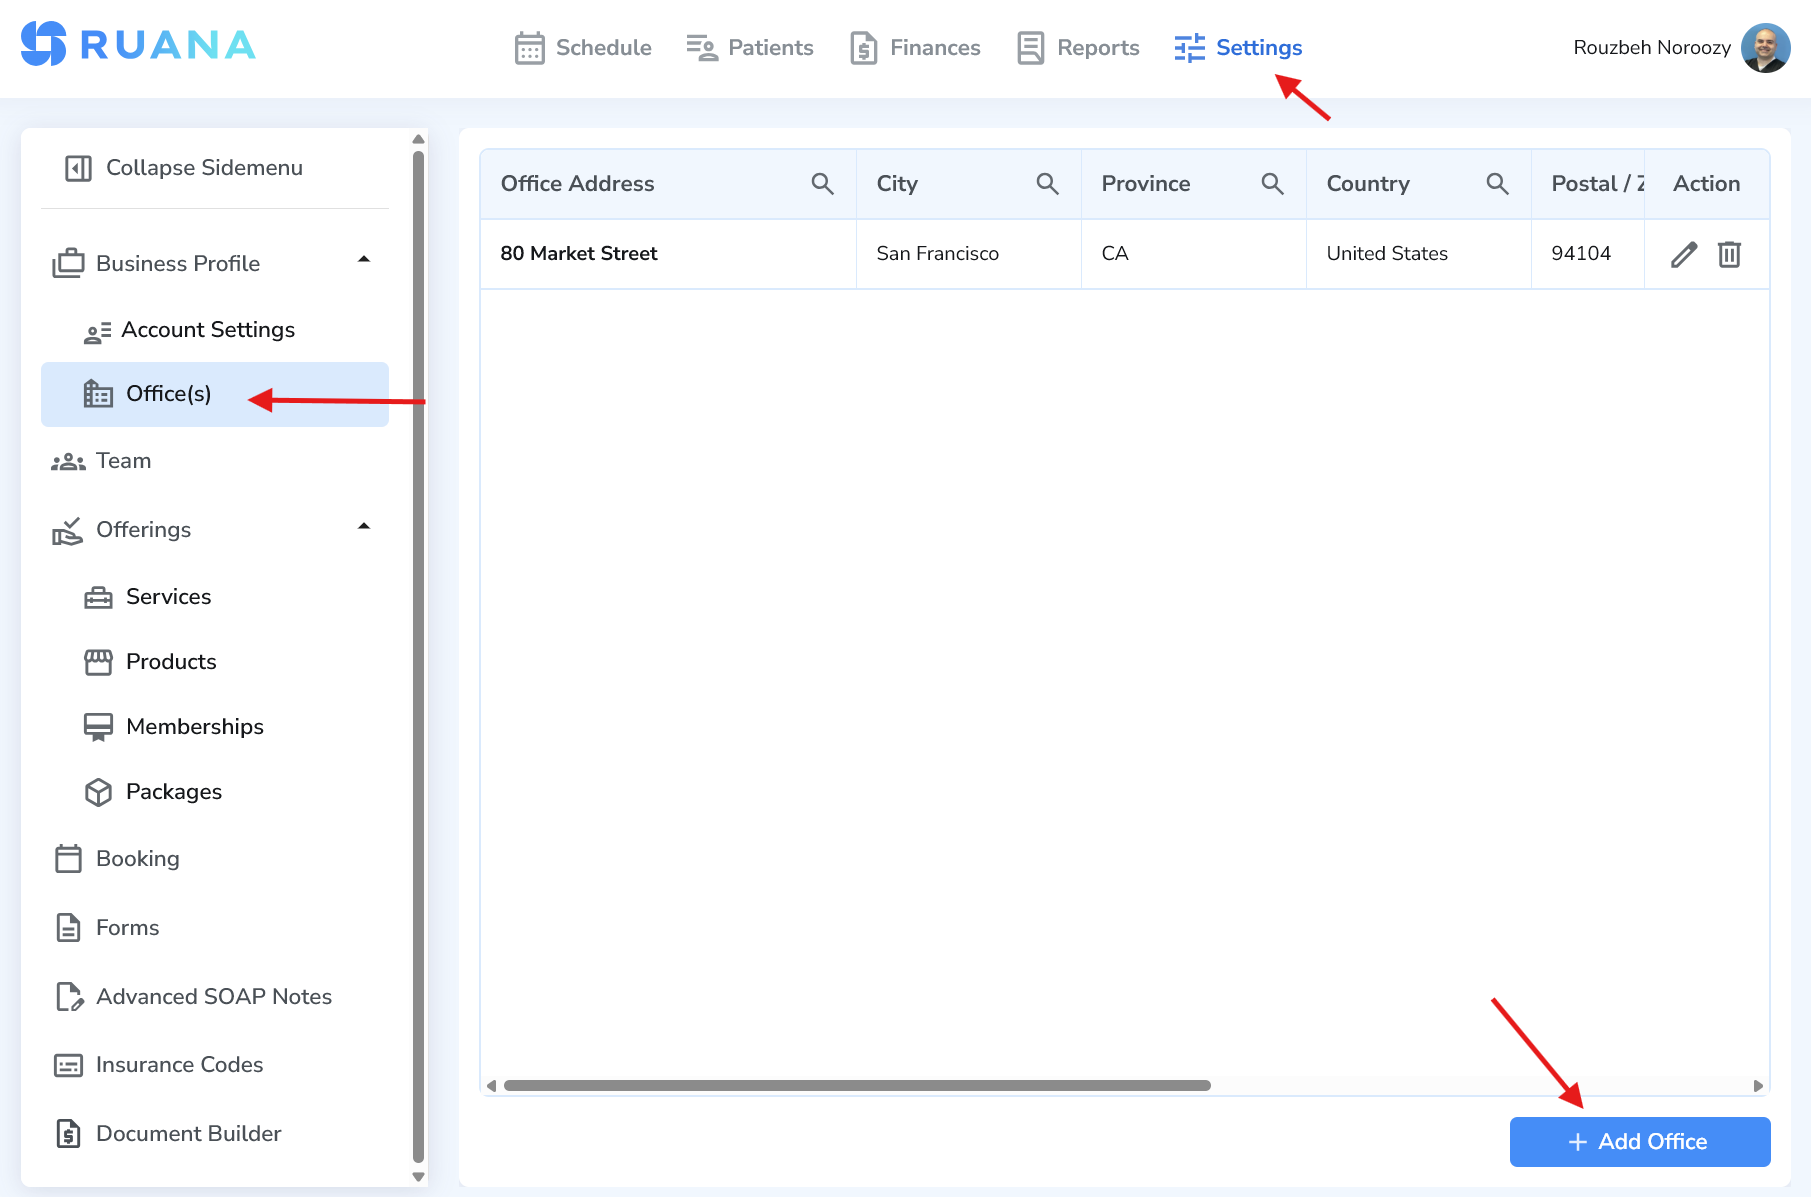
Where to find Office settings
- Click Settings in the top navigation
- Open Business Profile
- Select Office(s)
- Click Add Office
Why this step matters
Offices control availability and help Ruana prevent appointments from being scheduled at the wrong time or location. If you do not create at least one office, your scheduling and booking setup may be incomplete.
How to add a new office
- Go to Settings → Business Profile → Office(s)
- Click Add Office
- Complete the General Information section
- Set the Working Hours (availability)
- Click Save
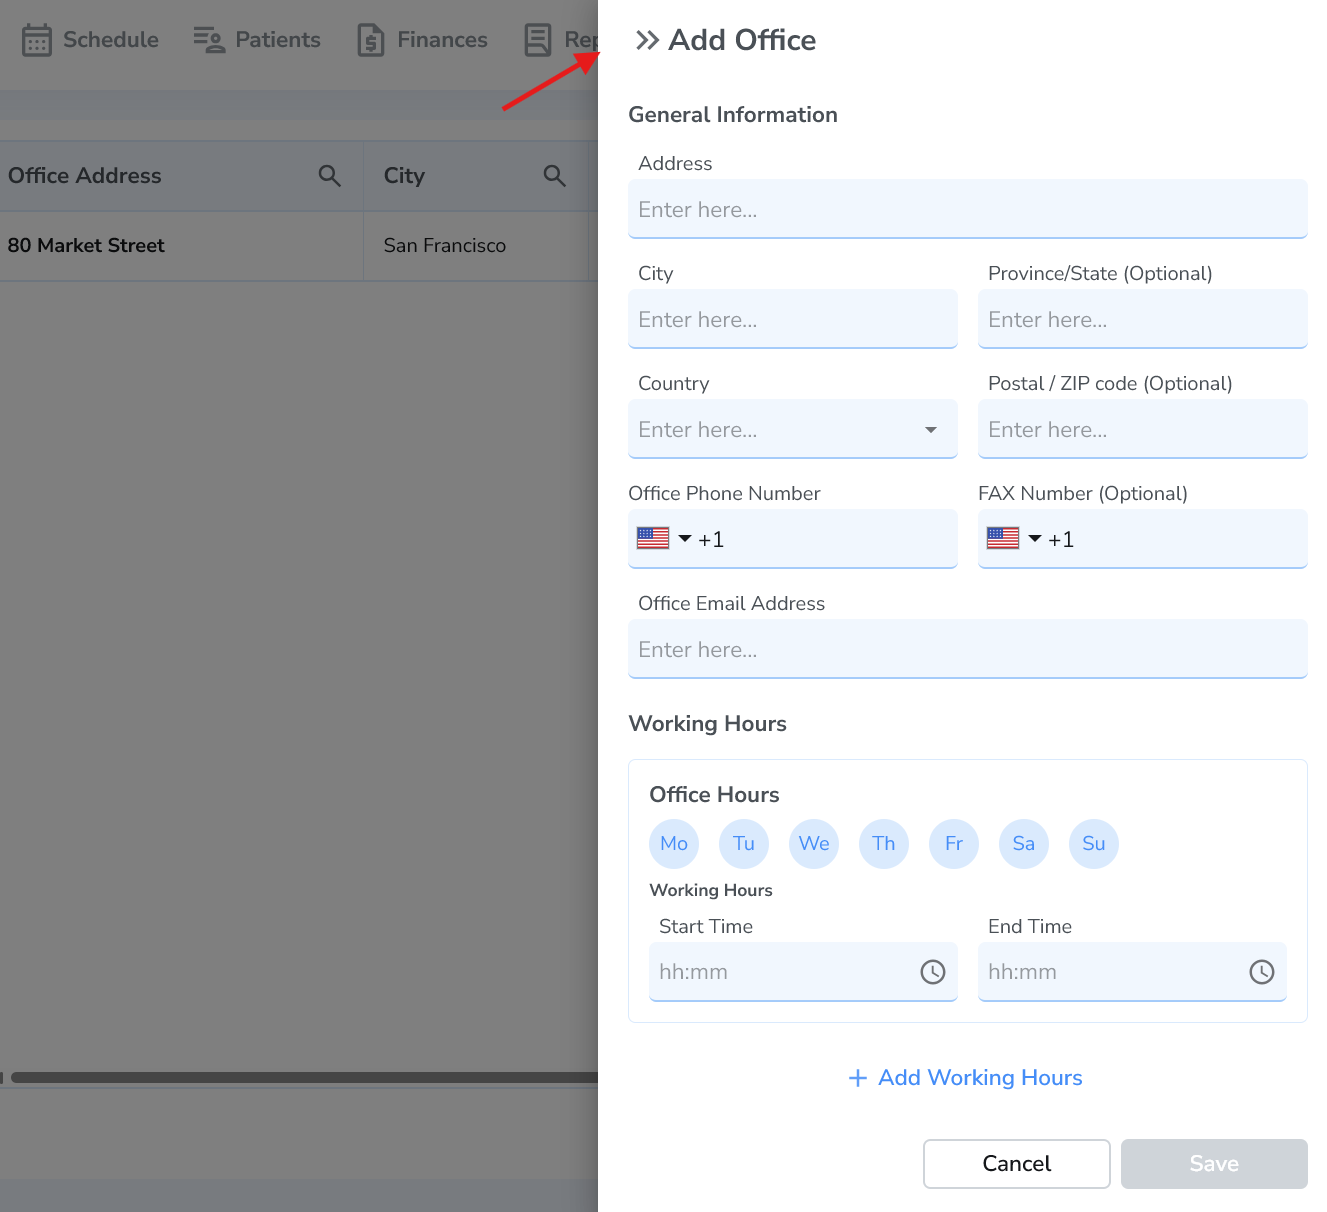
General information fields
The General Information section defines the office’s address and basic contact details. These details may appear in documents and internal reporting, and they help staff confirm they are working in the correct location.
- Address – The physical street address for this office.
- City – The city where this office is located.
- Province/State (Optional) – Helpful for US/Canada and some address formats.
- Country – Used for accurate business records and reporting.
- Postal/ZIP Code (Optional) – Recommended when available.
- Office Phone Number – Primary office contact number (optional but recommended).
- Fax Number (Optional) – Add only if your clinic uses fax workflows.
- Office Email Address (Optional) – Office-specific email address if different from your main clinic email.
Tip: If you only have one physical location, you still need at least one office in Ruana. If you have multiple locations, create one office per location.
Working hours (availability)
Working hours define when patients can be scheduled at this office. Ruana uses this information to prevent scheduling outside clinic availability.

How to set working hours
- Select days – Choose the weekdays this office is open.
- Start and End time – Set your open/close times for each day.
- Add Working Hours – Add multiple time blocks (example: mornings + afternoons with a lunch break).
Common mistake: forgetting breaks
If you have a lunch break or split shift, use Add Working Hours to create multiple blocks (e.g., 09:00–13:00 and 15:00–19:00). Otherwise, Ruana may allow bookings during break times.
Saving and editing offices
When all required fields are complete, click Save. The office becomes available immediately for scheduling. If you later need to change the address or hours, you can edit the office at any time.
- Save – Activates the office for scheduling.
- Edit – Updates address, contact info, or working hours.
- Multi-location clinics – Add one office per location and assign staff accordingly in the next steps.
Best practices and common mistakes
- Create at least one office before you configure online booking.
- Double-check addresses if they appear on invoices or business documents.
- Set working hours carefully to prevent bookings outside availability.
- Use multiple working-hour blocks if you have breaks.
- Keep office contact details consistent so staff and patients know the correct location information.
What’s next
Next, continue with Step 3: Add your team members so practitioners and staff can access Ruana and begin scheduling, documentation, and billing workflows.
FAQ
Do I need more than one office?
Only if you have multiple physical locations. If you have one clinic location, create one office and configure its working hours.
Why can’t patients book outside working hours?
Ruana uses office working hours to protect your schedule and prevent bookings when your clinic is closed.
Can I change working hours later?
Yes. You can edit working hours anytime. Changes affect future availability and booking options.