Step 8: Create Digital Forms in Ruana (Form Creator)
Ruana makes it easy to build digital forms for your clinic—whether you need Patient intake forms or Practitioner exam / progress note forms. You can start from a template, customize everything, and publish in minutes.
What is the Form Creator?
The Form Creator lets you build digital forms for Patients (intake forms, consent packets)
or Practitioners (exam forms, progress notes). You can start from a template, customize everything,
and apply the form to one or more services.
Tip: If you like a template, you still need to make it your own. Select the template, then customize fields, questions, and consents to match your clinic workflow.
On this page
- Where to find the Forms section
- Start a new form (Patient vs Practitioner)
- Choose a template (or start from scratch)
- Step 1: Primary Settings
- Step 2: Patient Fields
- Step 3: Questionnaire
- Step 4: Consents
- Best practices
- What’s next
Where to find the Forms section
In Ruana, go to Settings and select Forms from the left sidebar. This is where you can create and manage both Patient and Practitioner forms.
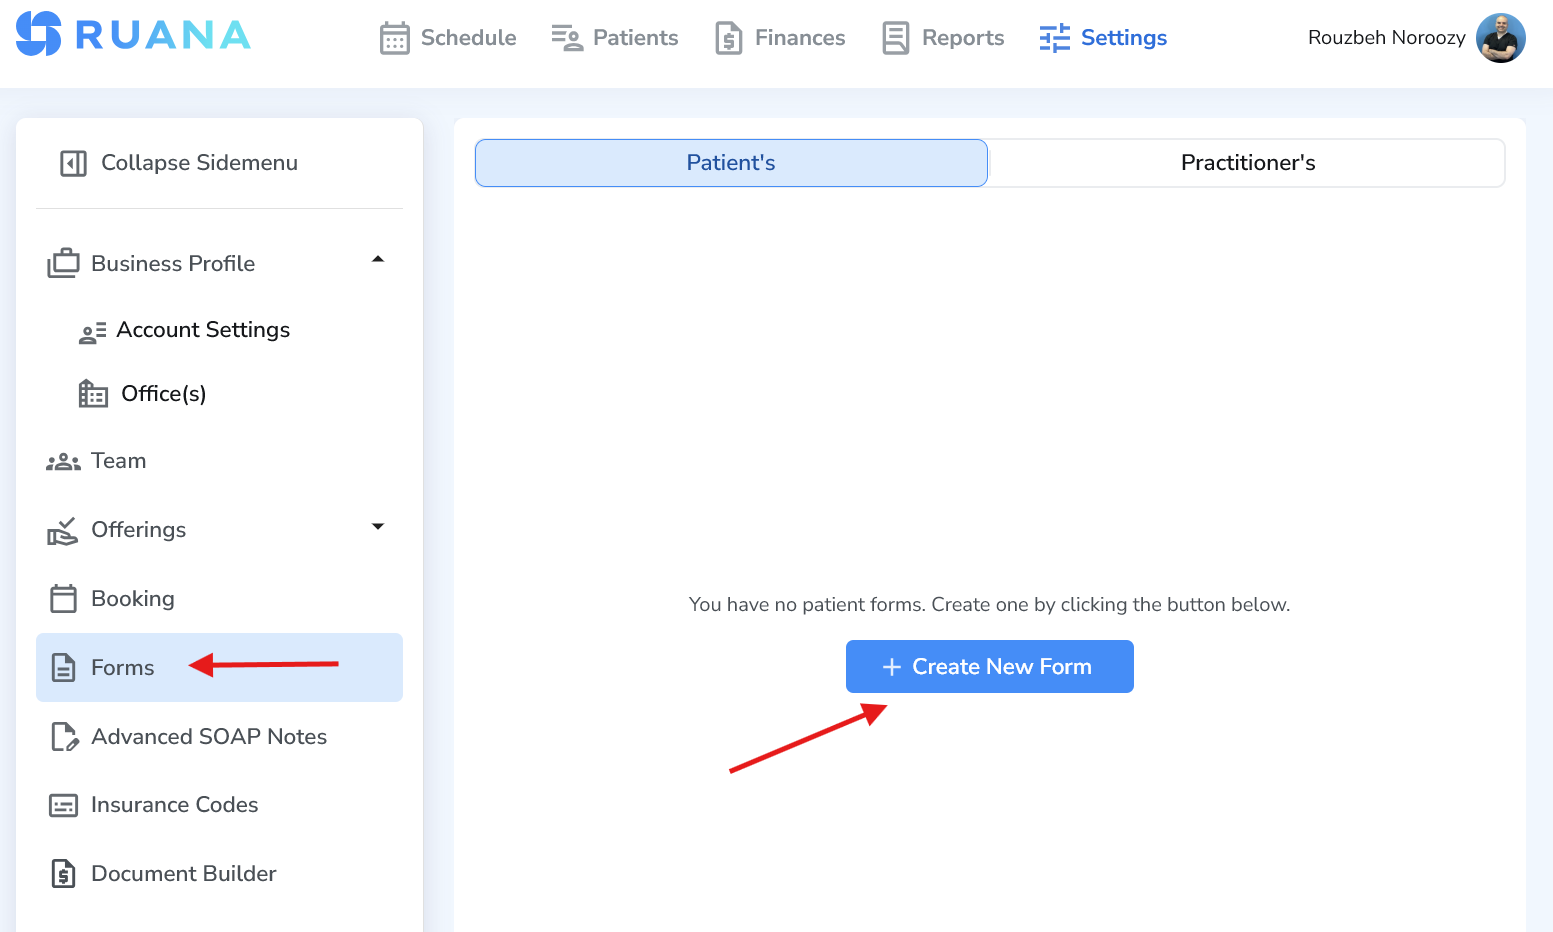
Start a new form (Patient vs Practitioner)
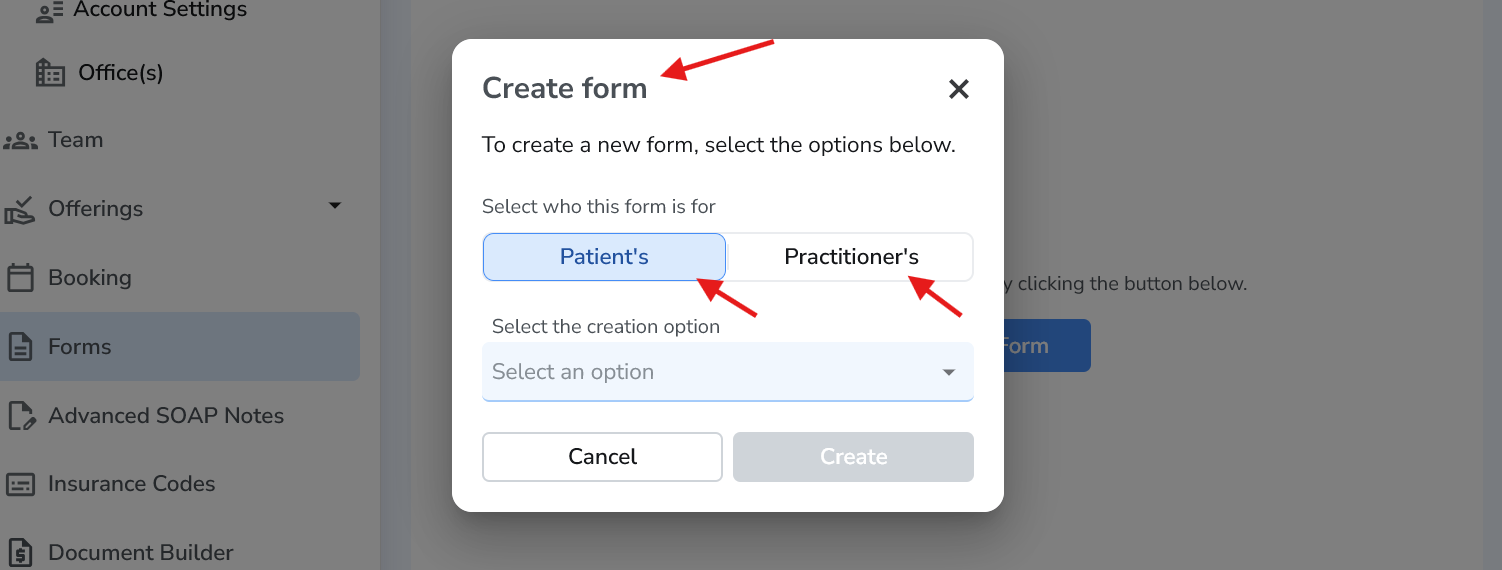
Click + Create New Form. A pop-up will appear where you choose who the form is for:
- Patient’s – Intake forms, health history, consent packets, questionnaires.
- Practitioner’s – Exam forms, progress notes, internal clinical checklists, etc.
Choose a template (or start from scratch)
Next, select the creation option: Template (recommended) or New Form (blank). In this example, we’ll use a template and choose: New Patient Intake Form – Massage.
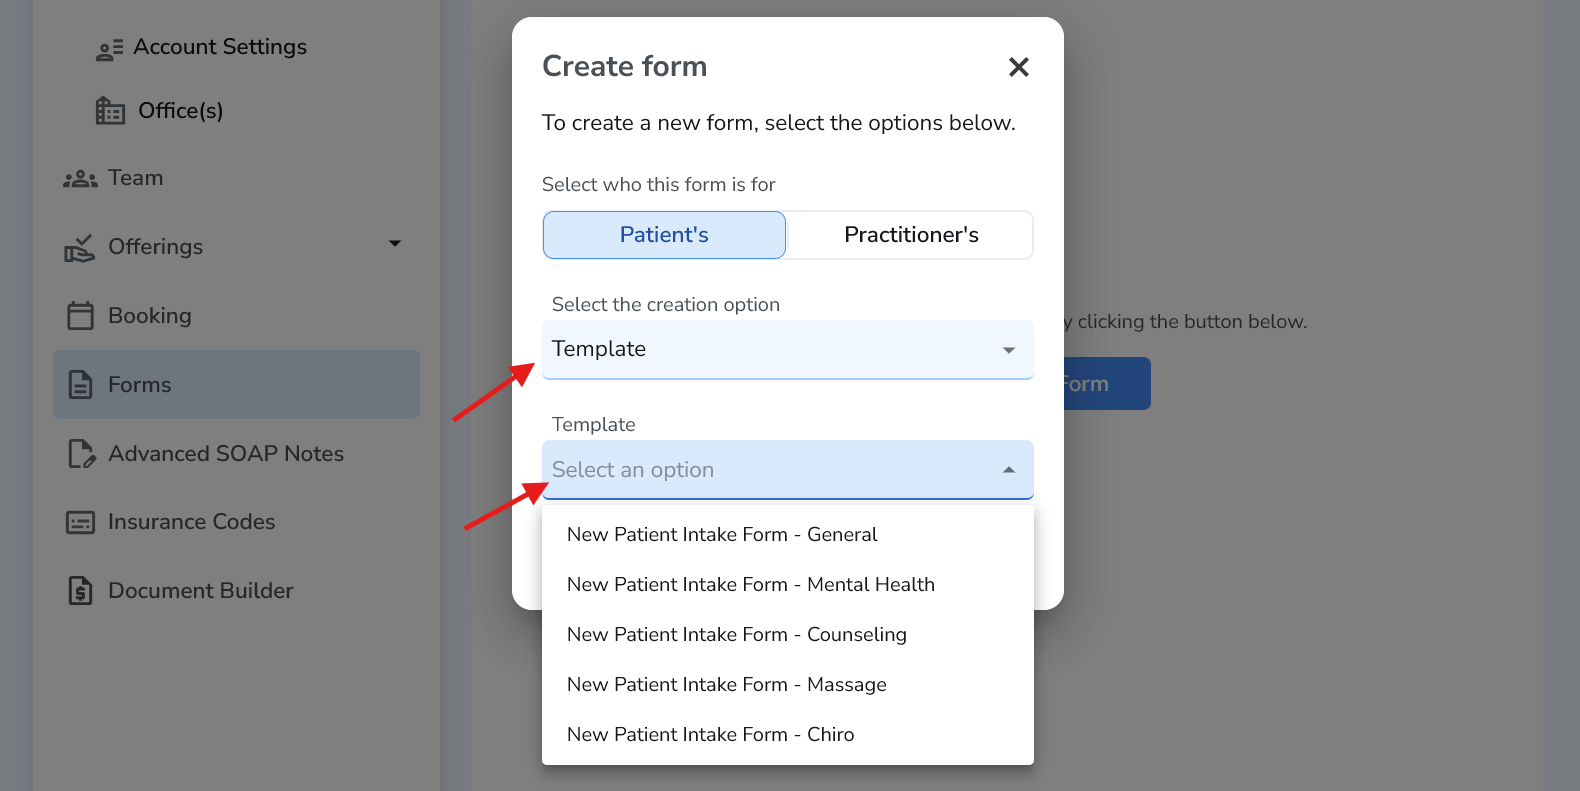
Important: Templates are starting points. After selecting one, you should customize it so it matches your clinic (questions, fields, consents, wording, etc.).
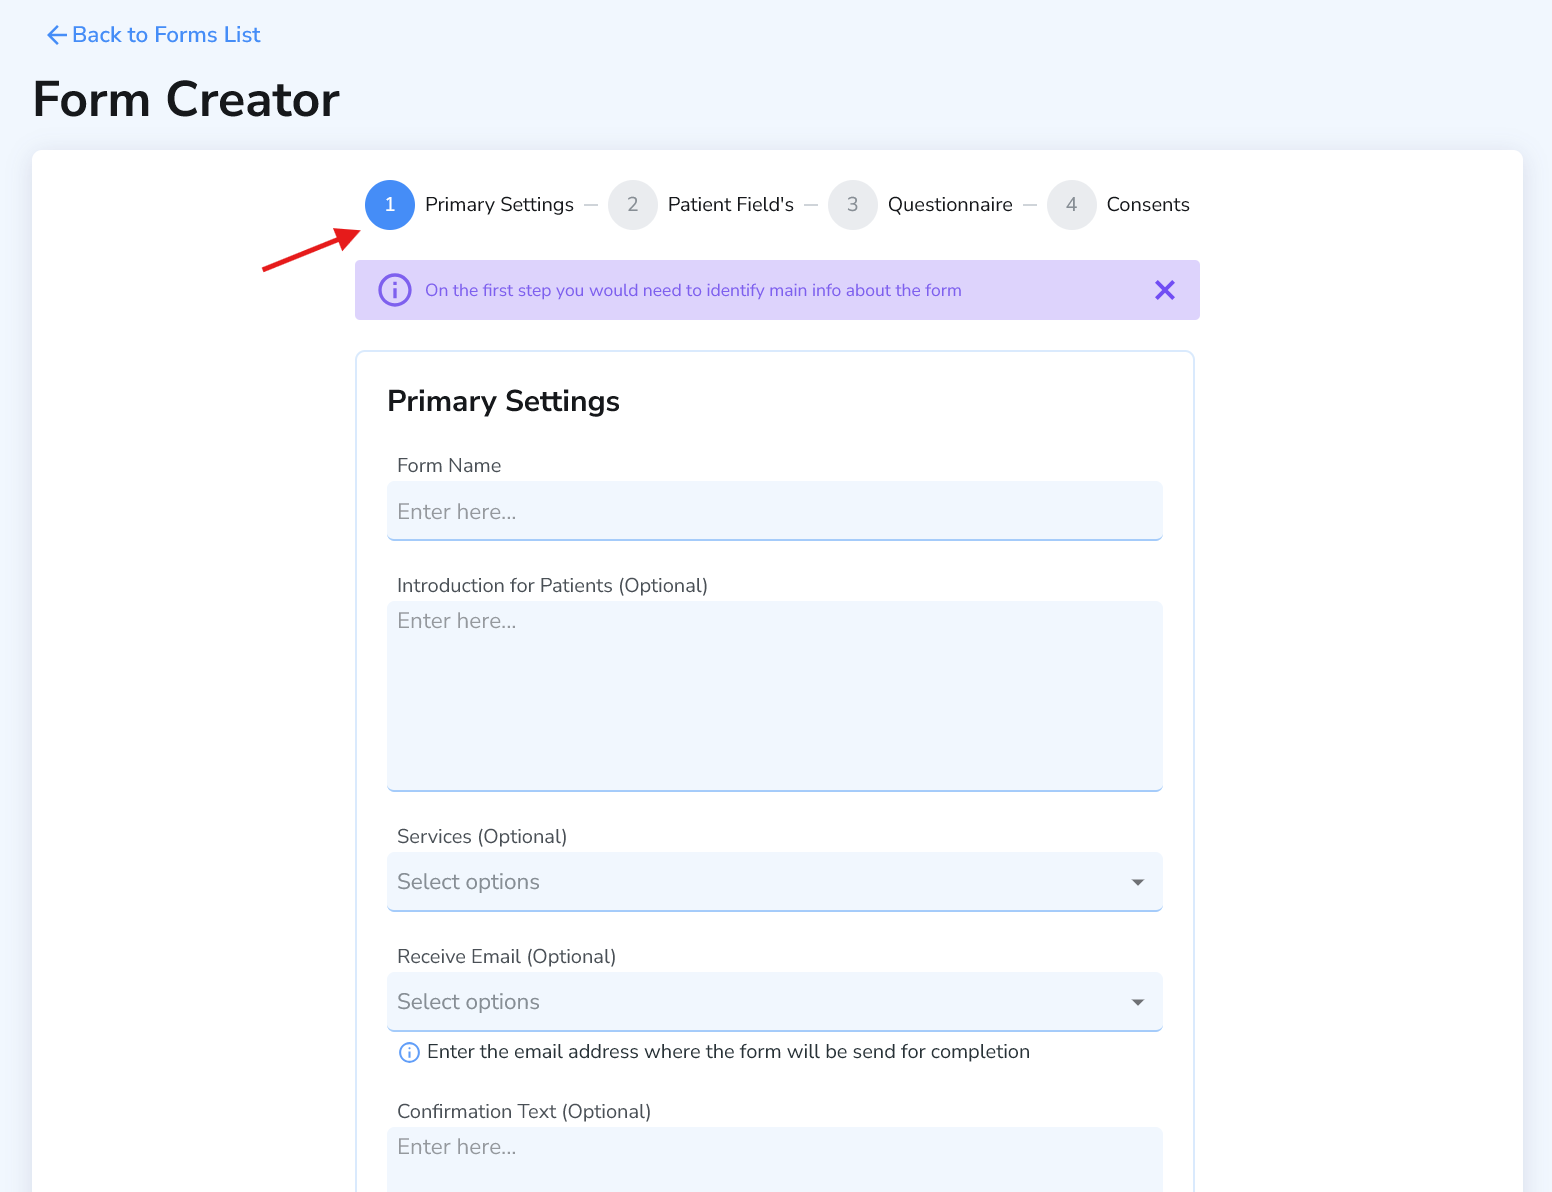
Step 1: Primary Settings
After selecting a template, Ruana will open the Form Creator. In Primary Settings you can:
- Enter your Form Name.
- Add an Introduction for Patients (optional) to explain what this form is for.
- Apply the form to one or more services (so it appears for the right appointment types).
- Add a Confirmation Text (optional) that patients see after submitting the form.
- Click Next Step.
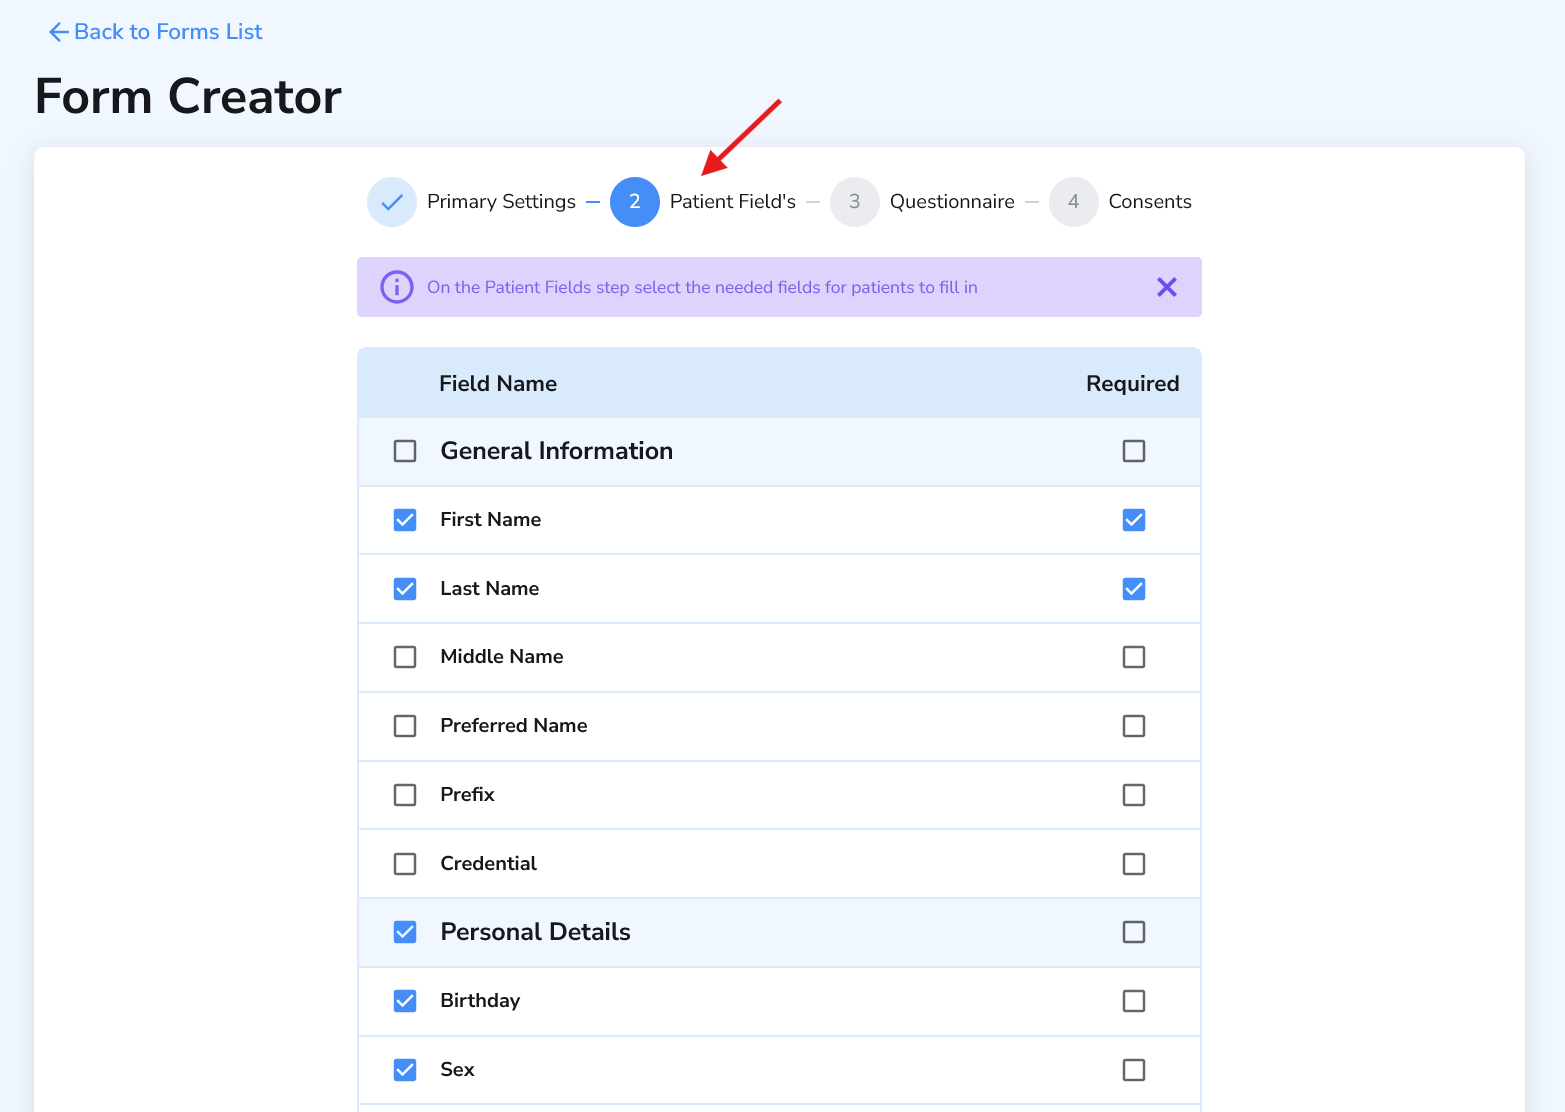
Step 2: Patient Fields
In this step, you choose what information the patient should fill out. You can enable or disable sections (like contact information, address details, personal details, and more), and mark specific items as required. When you’re done, click Next Step.
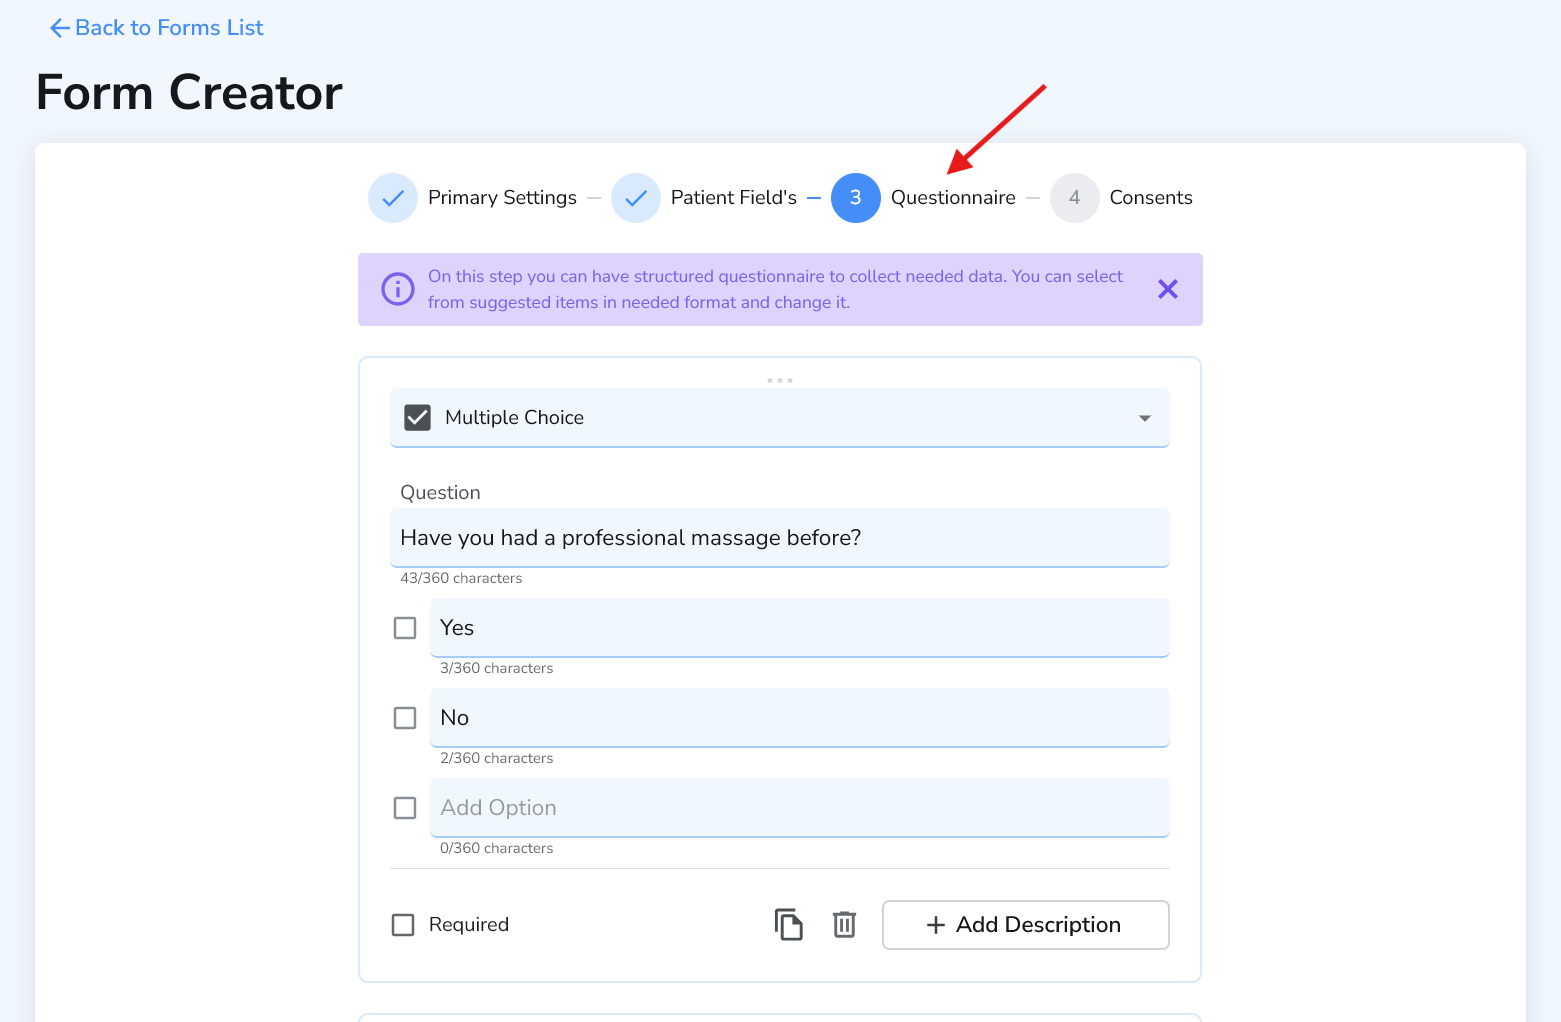
Step 3: Questionnaire
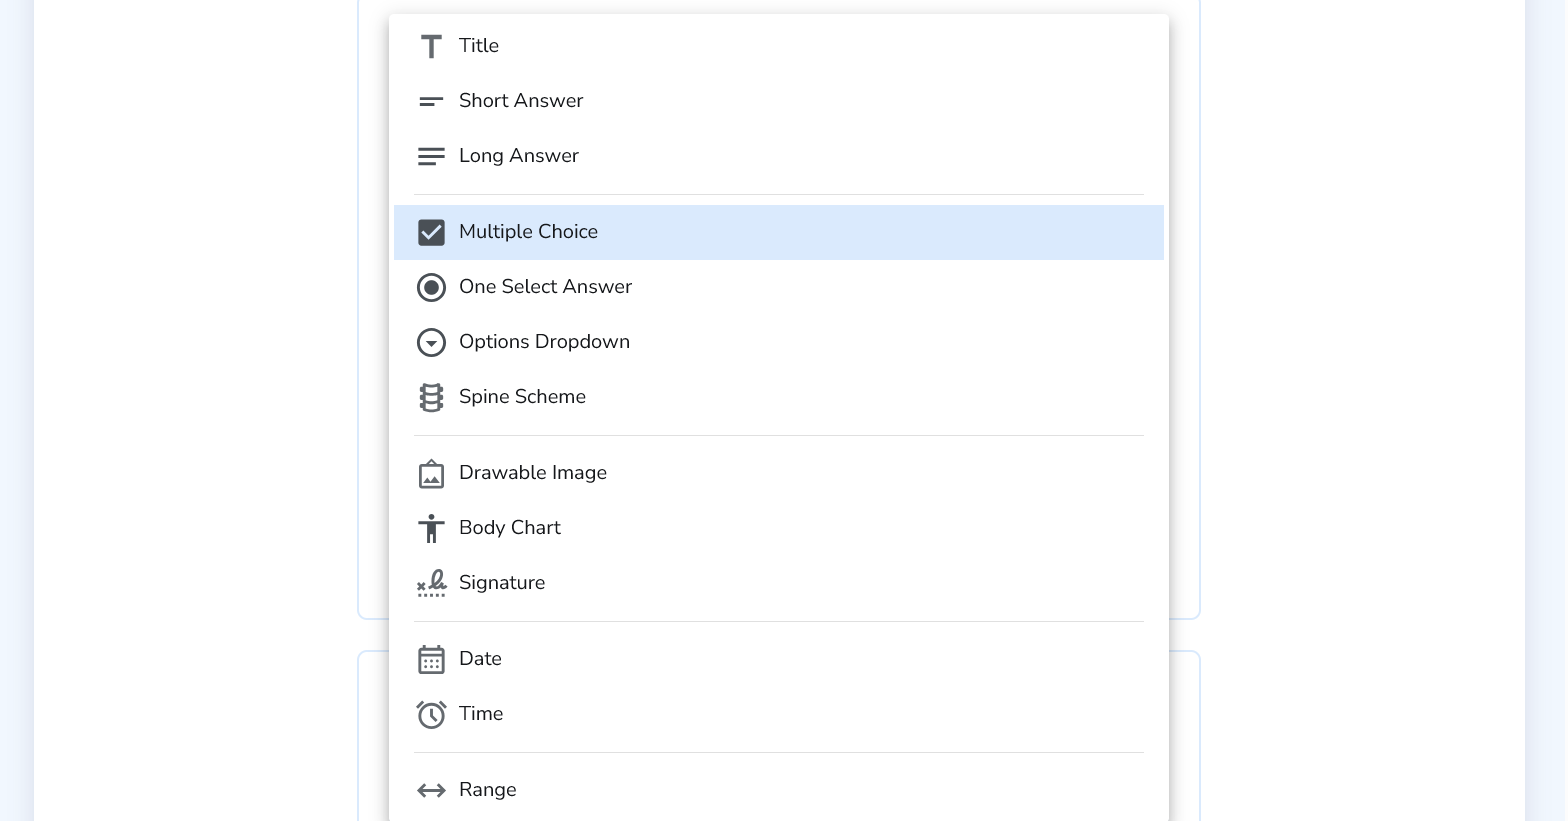
This step contains the template questions (if you started from a template). You can edit, remove, or add questions and fully customize: question types (multiple choice, long answer, dropdowns, body chart, signature, etc.), required rules, and descriptions. Once your questions look right, click Next Step.
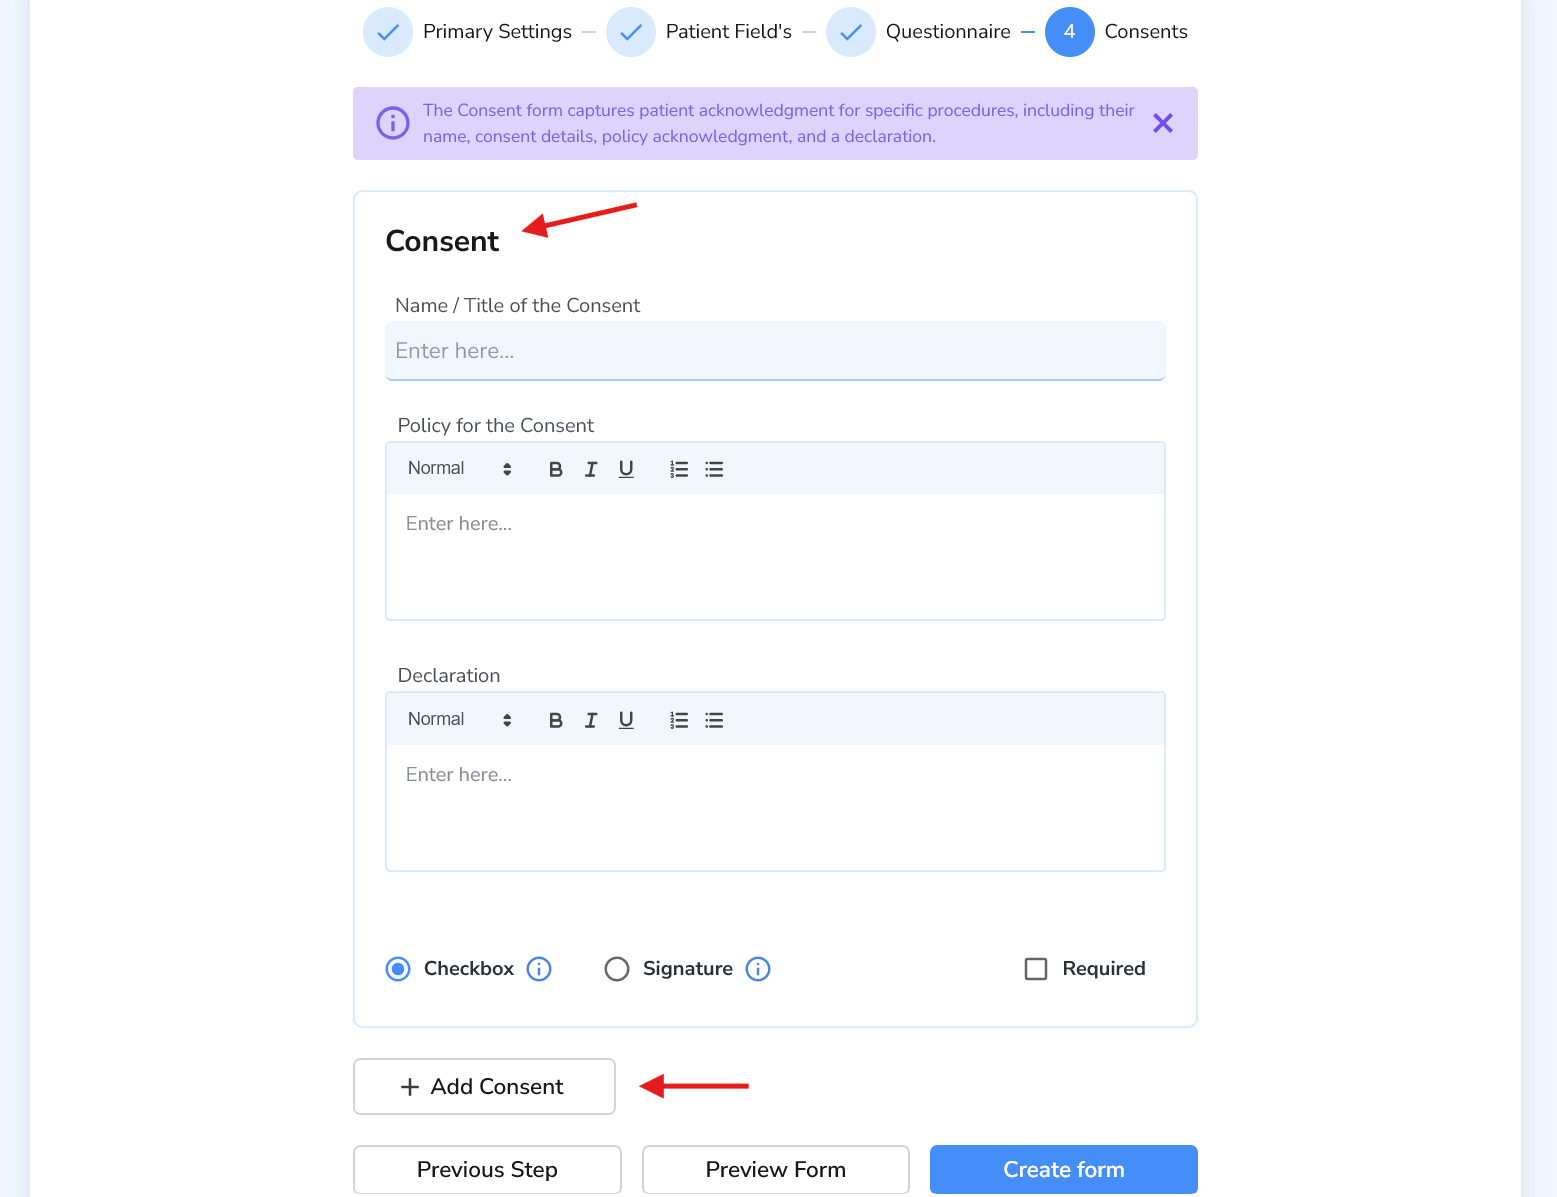
Step 4: Consents
In the final step, you can add consent forms. Add as many as your clinic needs (for example: informed consent, cancellation policy, privacy notice, or condition-specific consents). Then you can preview the form to confirm everything looks correct—and click Create to publish it.
Best practice: Preview your form before publishing. This helps you catch missing required fields or confusing questions before patients see it.
Best practices for digital forms
- Keep it simple: Only ask what you truly need to deliver safe care.
- Use templates: Templates save time—then customize to fit your clinic.
- Attach to services: Make sure the form is applied to the correct service(s).
- Use confirmation text: Tell patients what happens next after they submit.
- Review consents: Keep your consent language consistent with your policies.
What’s next
Once your forms are created, you can start assigning them to appointments and building a smoother patient experience. Next, many clinics set up Advanced SOAP Notes to speed up documentation and keep notes consistent.